Assignment 2: Project Organization
1 Accept Assignment on Github Classroom
Clone this assignment to your computer.
2 Git Reset and Revert
We will now see how we can
- View the file history for each commit
- Reset to a previous commit
- Compare “Hard” vs “Soft” resets
- Revert individual commits
2.1 GitLens
- Install the GitLens Extension for VS Code
This provides more Git functionality.
Some of the tools (not the ones we will use today) require a Pro subscription. If you have the GitHub Student Developer Pack, you can get a free Pro subscription to GitLens by logging in with your GitHub account here. You will also have to make sure GitLens in VS Code is logged in with the same account.
2.2 Setting Up a Git History
We will simulate a few git commits in order to use for practice.
For this exercise on Git Reset and Revert, do not "push" or "sync" your changes to GitHub until you have finished messing with your commit history.
If you do push/sync, you may have to do some extra work to fix your remote repository.
Open up the “commit-history-revert-practice.md” document.
Then, one at a time
- Add a line of text to “Line 1:”
- Stage the commit, write a message “Edited Line 1”, and commit it
- Repeat for lines 2 and lines 3
Now, open your commit history by going to the “Source Control” tab in the activity bar and expanding the “Gitlens” menu at the bottom of the tab. 1
1 This was added when you installed GitLens, so if you have not done that please do so now.
You should now have a commit history that looks something like this:
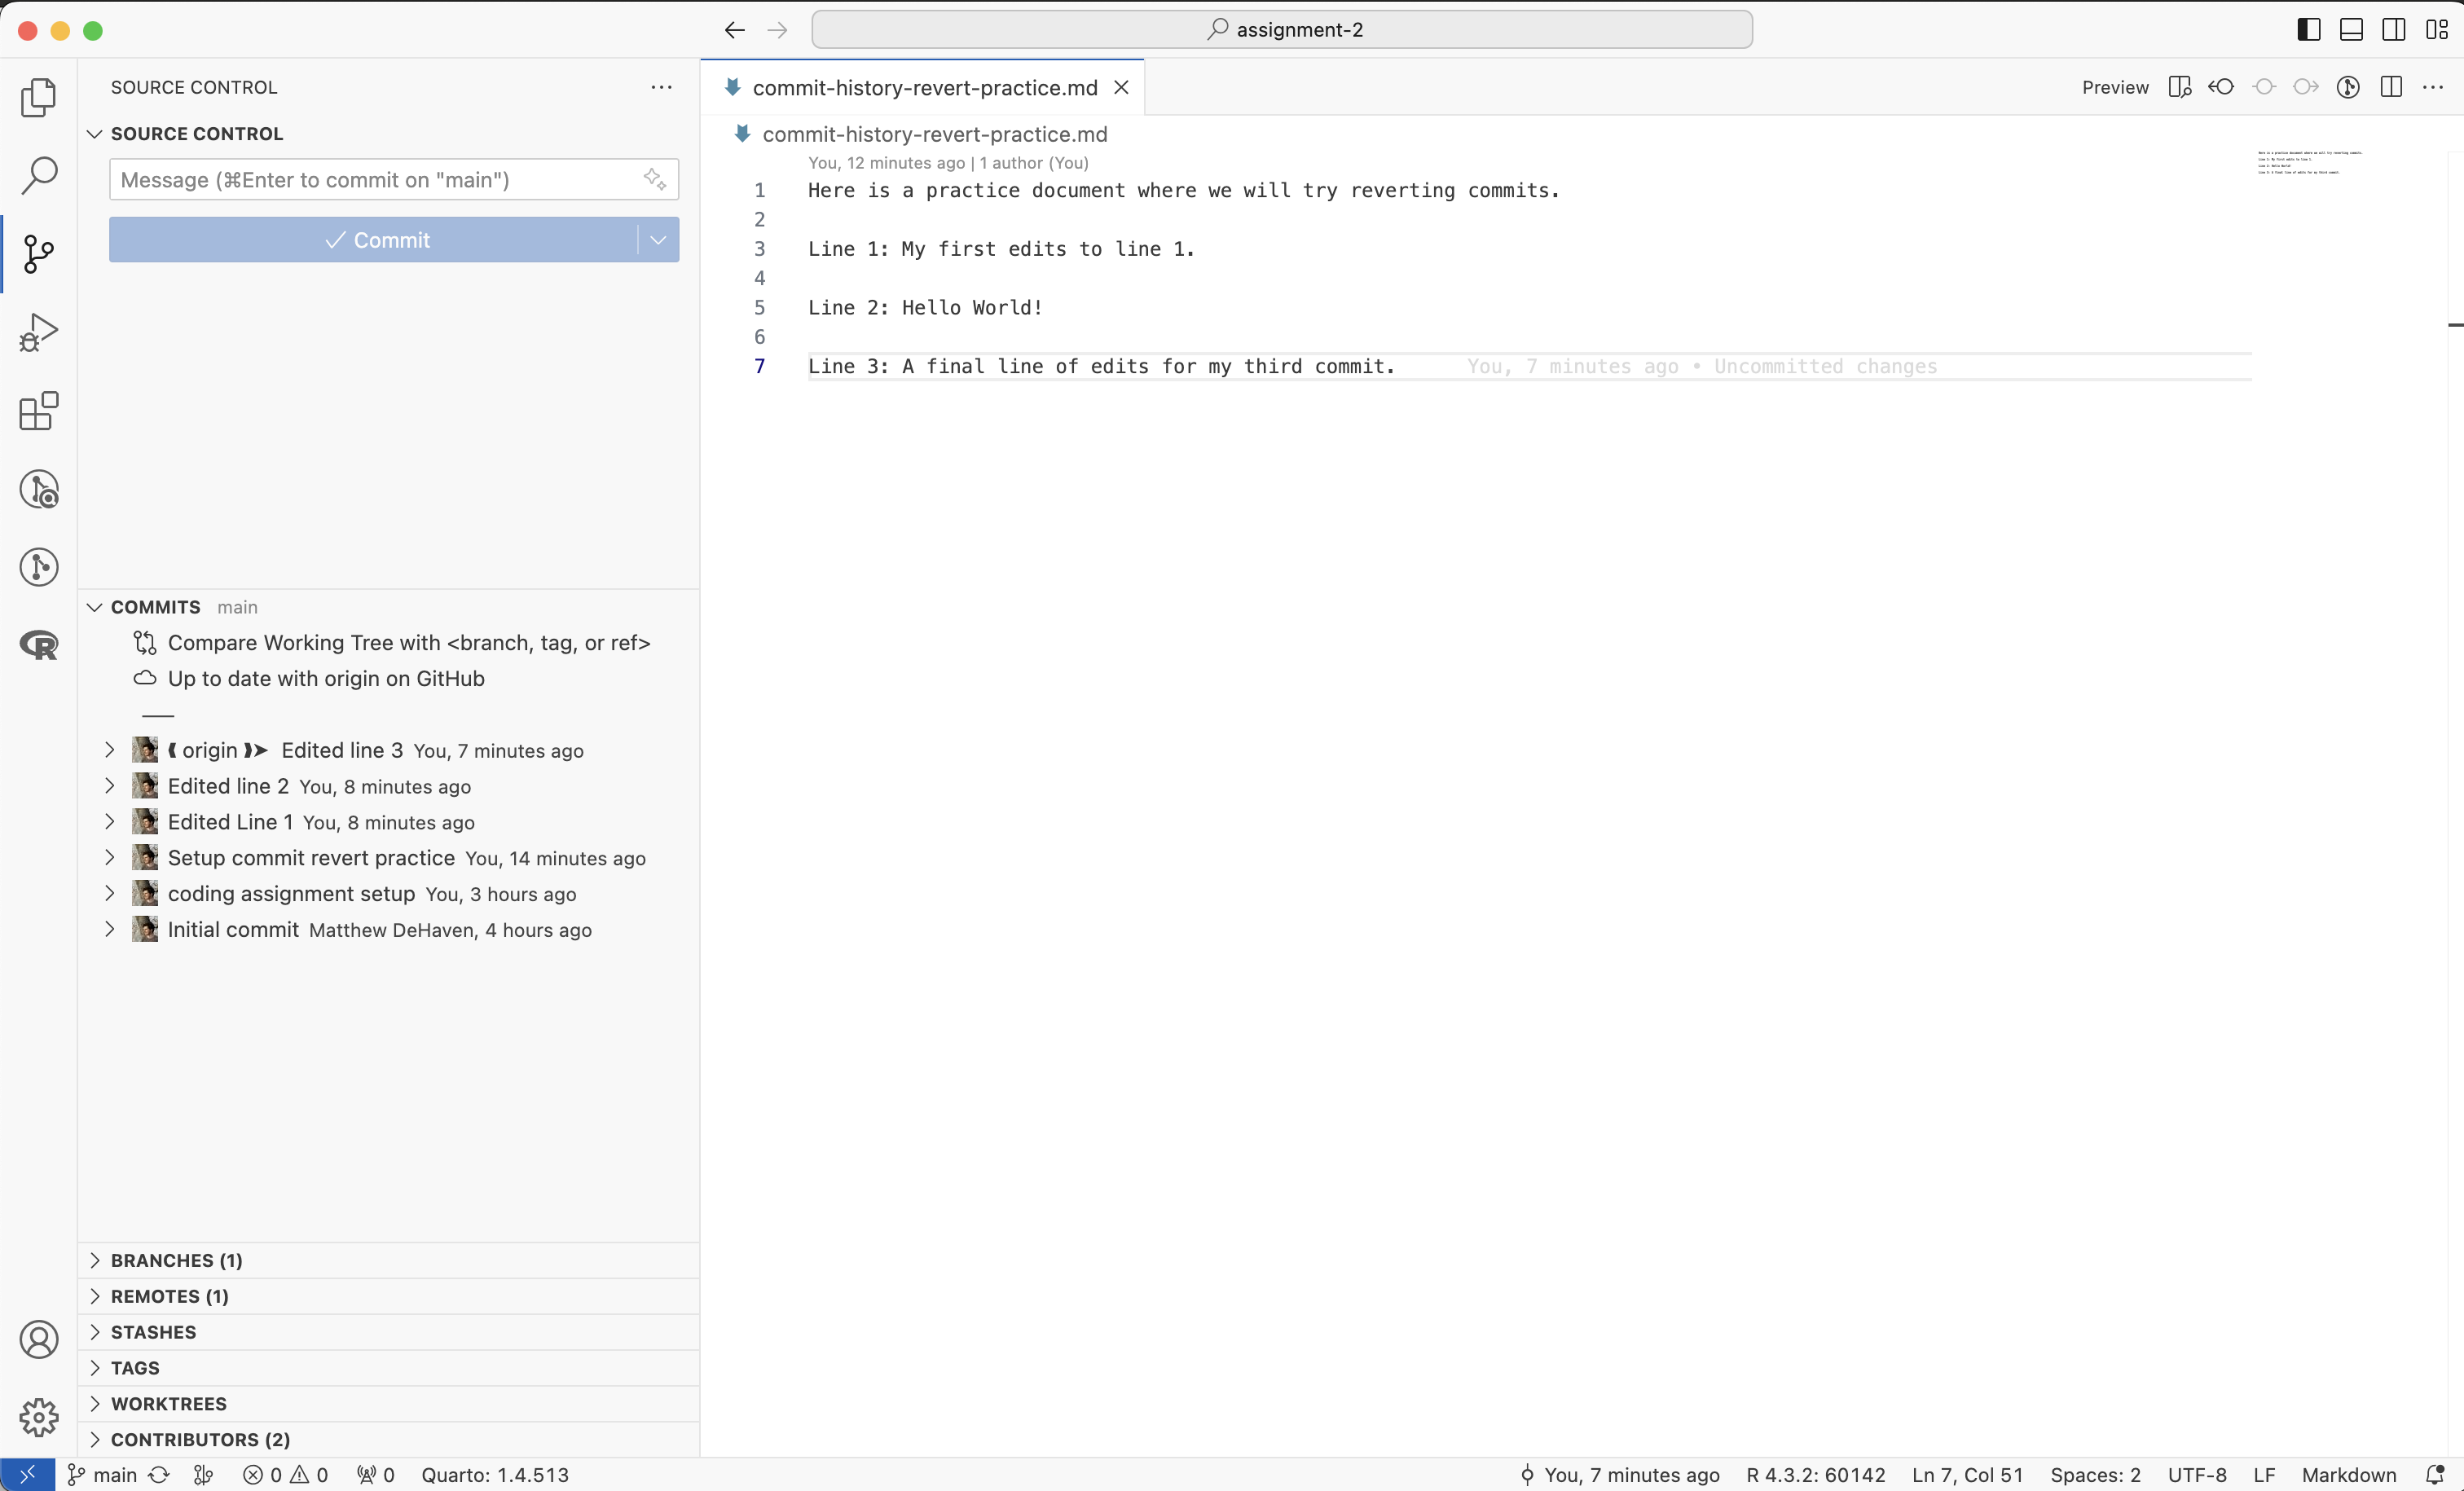
Notice that in the source control tab, there is a new dropdown menu called “GitLens”. This view shows our commit history, just like the built-in “Graph” view. However, it has some added functionality that we will use today. For the rest of this exercise, I am going to minimize the “Graph” view and use the “GitLens” view.
Looking at your Git Changes
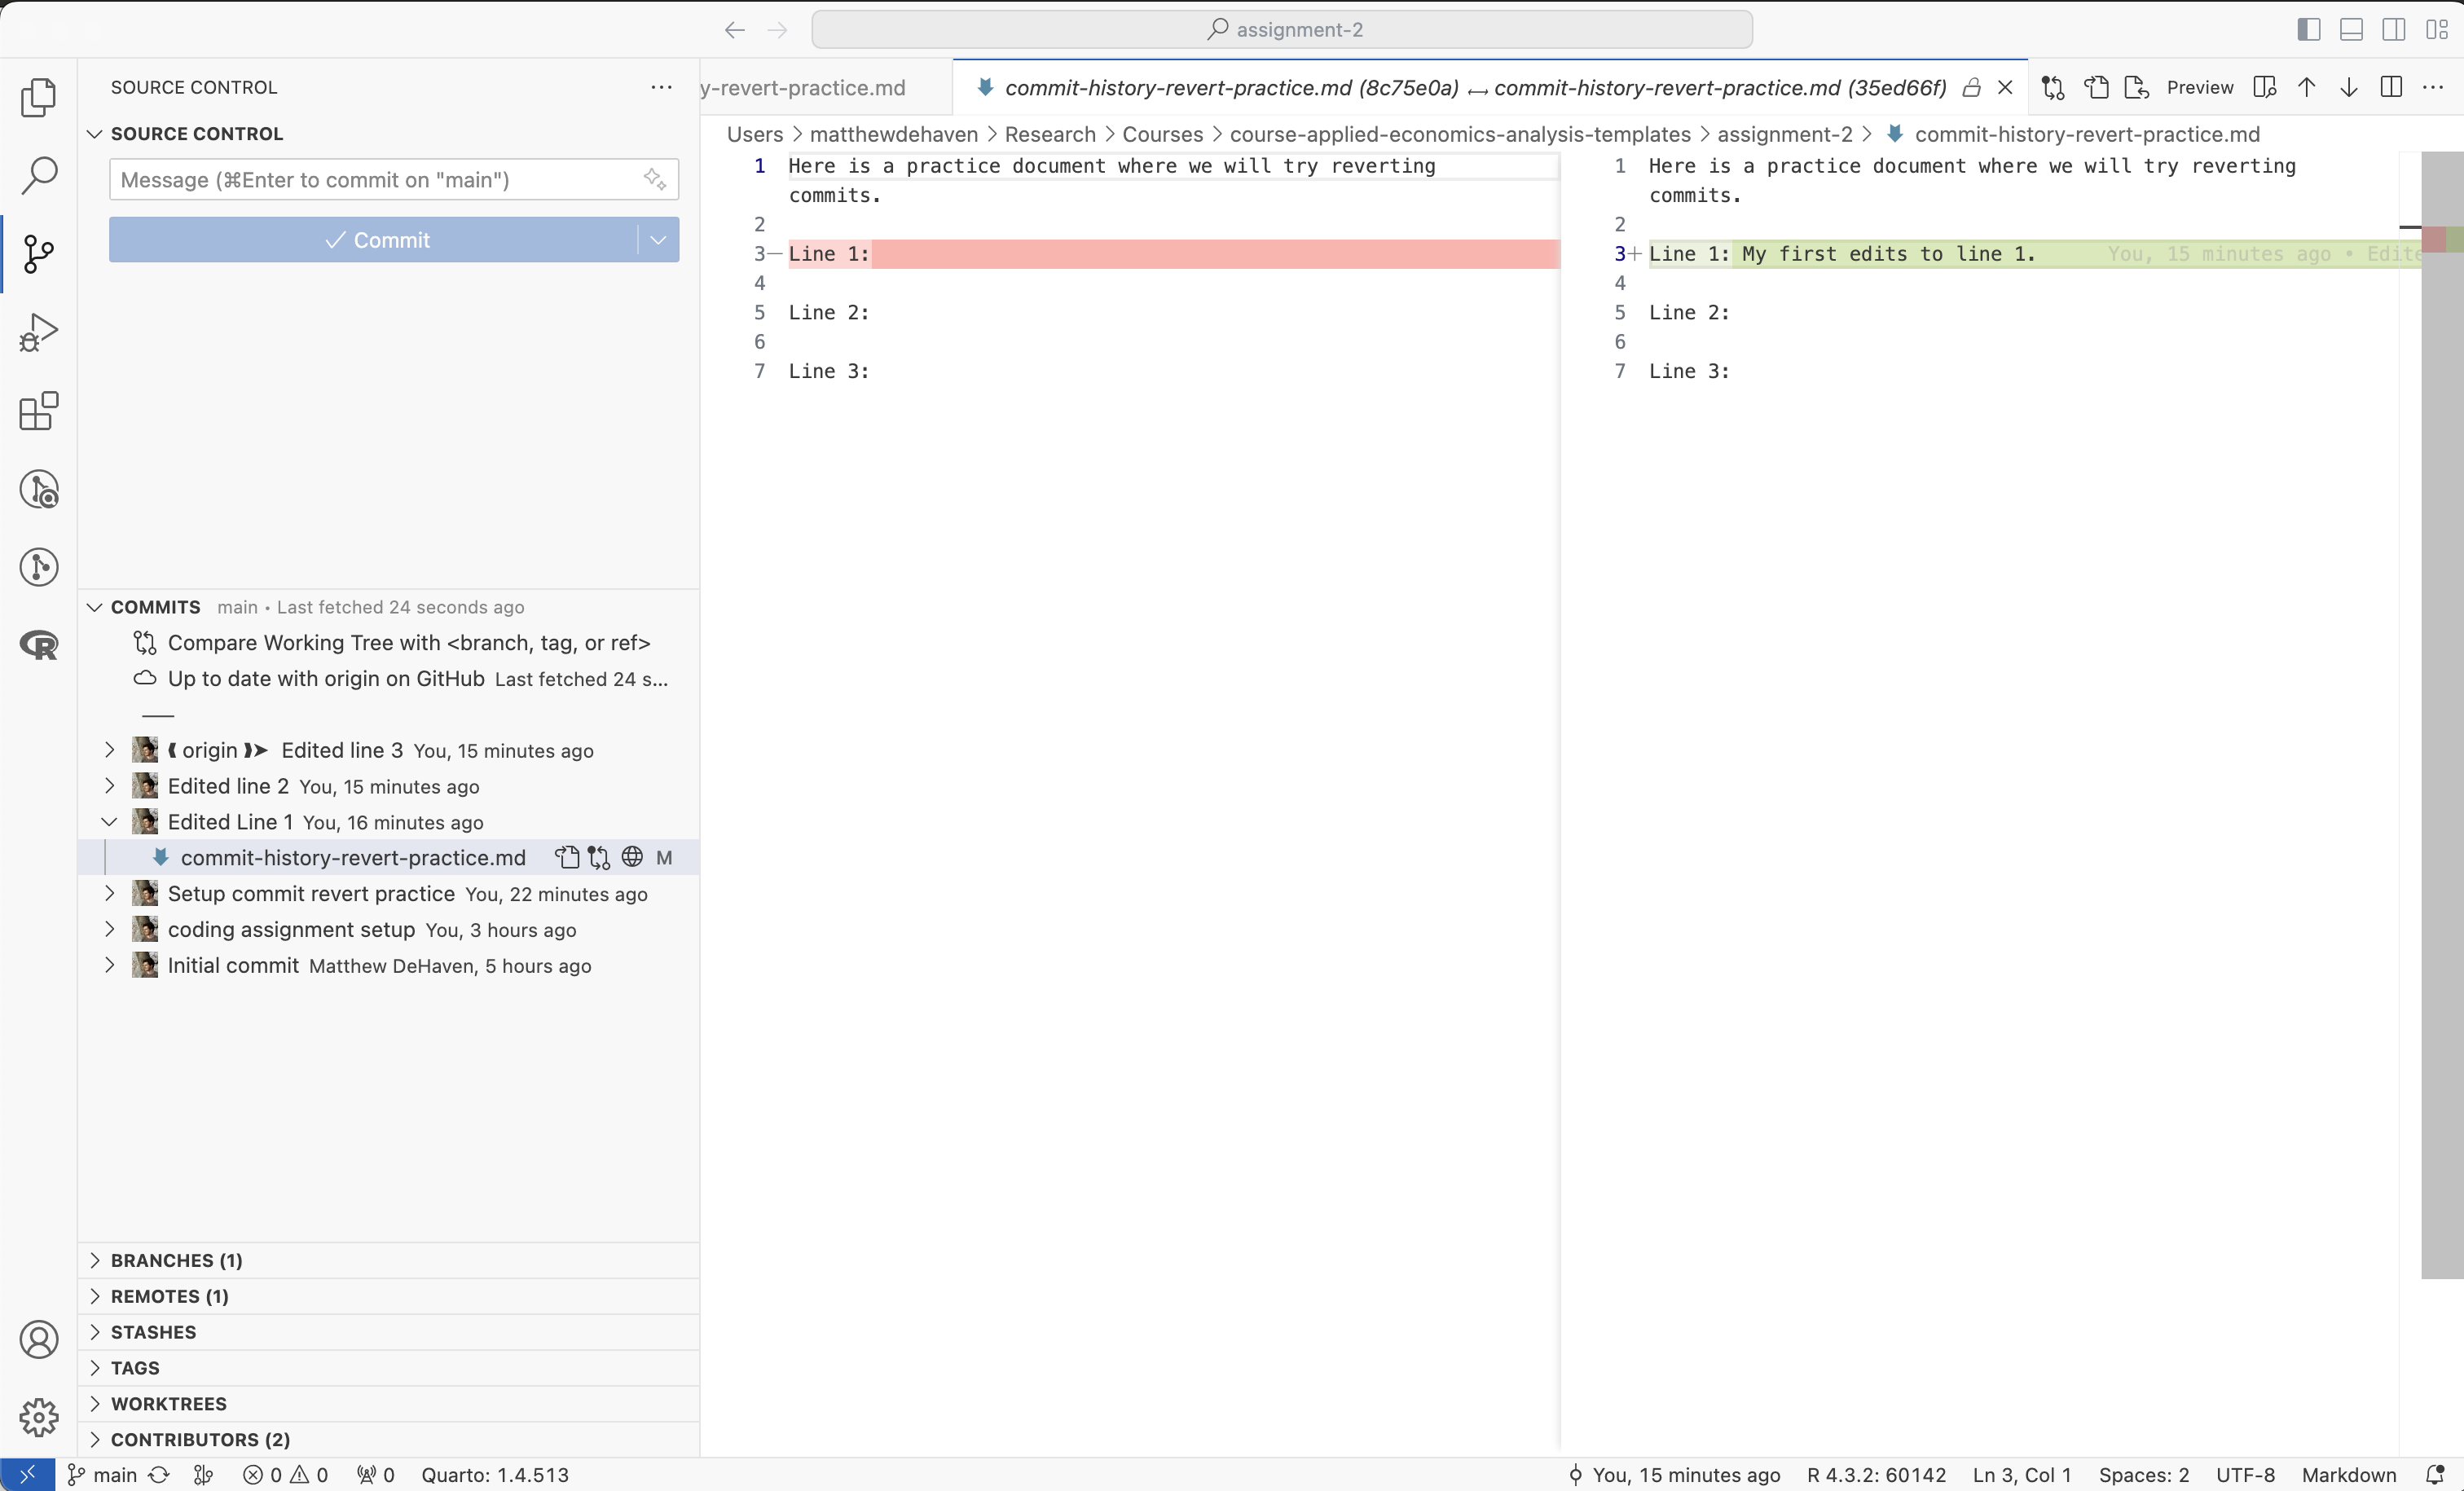
Click on the first commit “Edited Line 1” in the commit history.
You should now see a dropdown with the file we changed, click on the file.
This should open the following view of the changes made during that commit:
- Go ahead and open up any of the other git commits, and click on their files to see the changes.
The changes that we are currently seeing are between the commit we click on and the commit before it. It can be useful instead to see the difference between a commit in the past and our current state of the project.
- Click on the 2nd icon on the file “Open Changes with Working File”.
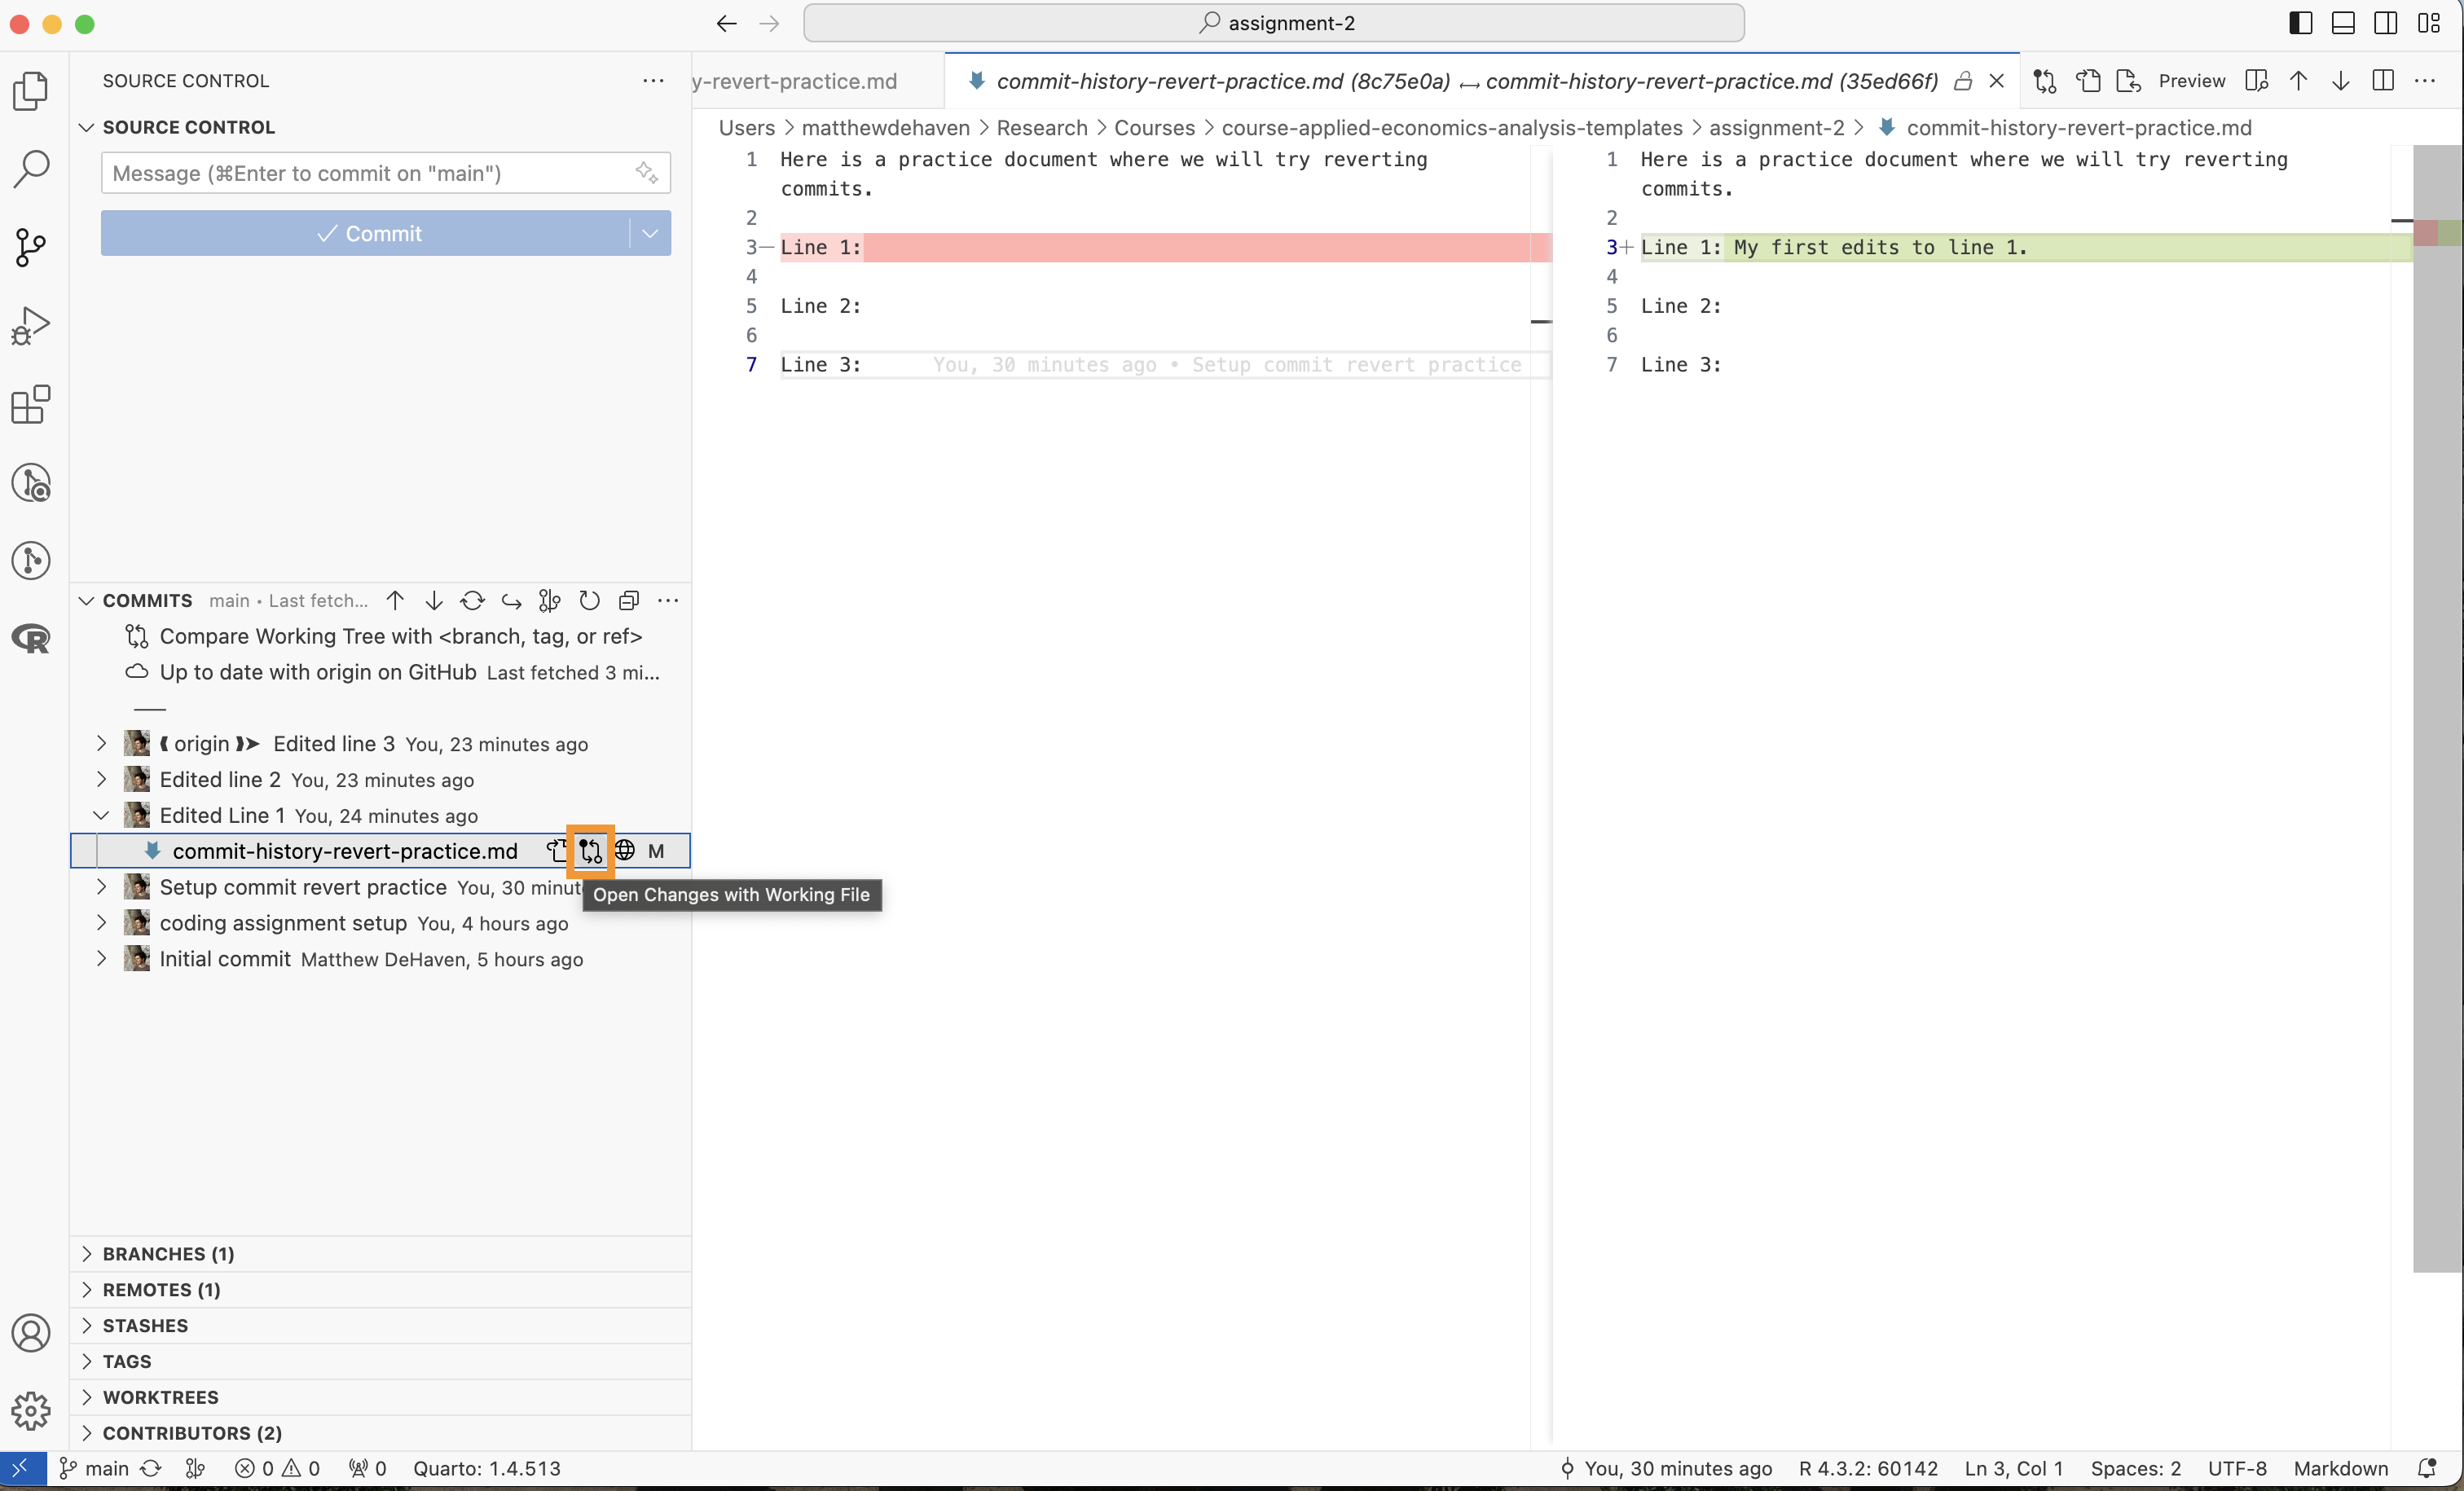
This will now display all of the changes between that commit on the left and the current state of the project on the right.
2.3 Resetting to a Commit
One way to change your commit history is to “reset” to a previous commit.
Be careful using this command! It can permanently delete code if you tell it to do so.
Soft Reset
A “soft” reset will
- move the repository back to a previous commit
- keep all of the changes made since that commit in your working directory (staged)
Now, let’s try a soft reset.
- Right click on the “Edited Line 2” commit in the “GitLens” commit history.
- Select “Reset Current Branch to Commit…” and then “Soft Reset”
You should now see that your commit history no longer has the “Edited Line 3” commit. However, if you open up the “commit-history-revert-practice.md” file, you should see that all three lines are still there. The third line is now just a staged change that you can recommit if you want (or you could make additional edits).
- Commit the staged changes again with the message “Re-edited Line 3”
Hard Reset
A “hard” reset will
- move the repository back to a previous commit
- discard all changes made since that commit
Now, try a hard reset.
- Right click on the “Edited Line 1” commit in the “GitLens” commit history.
- Select “Reset Current Branch to Commit…” and then “Hard Reset”
You should see that your commit history no longer has the “Edited Line 2” or “Edited Line 3” commits. If you open up the “commit-history-revert-practice.md” file, you should see that only “Line 1” edits are present. The other two changes have been permanently deleted.
Again, be very careful with a hard reset!
Reverting Commits
A safer, and sometimes cleaner way to edit your commit history is to “revert” a past commit.
This simply adds a new commit to our current project that is the inverse of the changes made in a past commit.
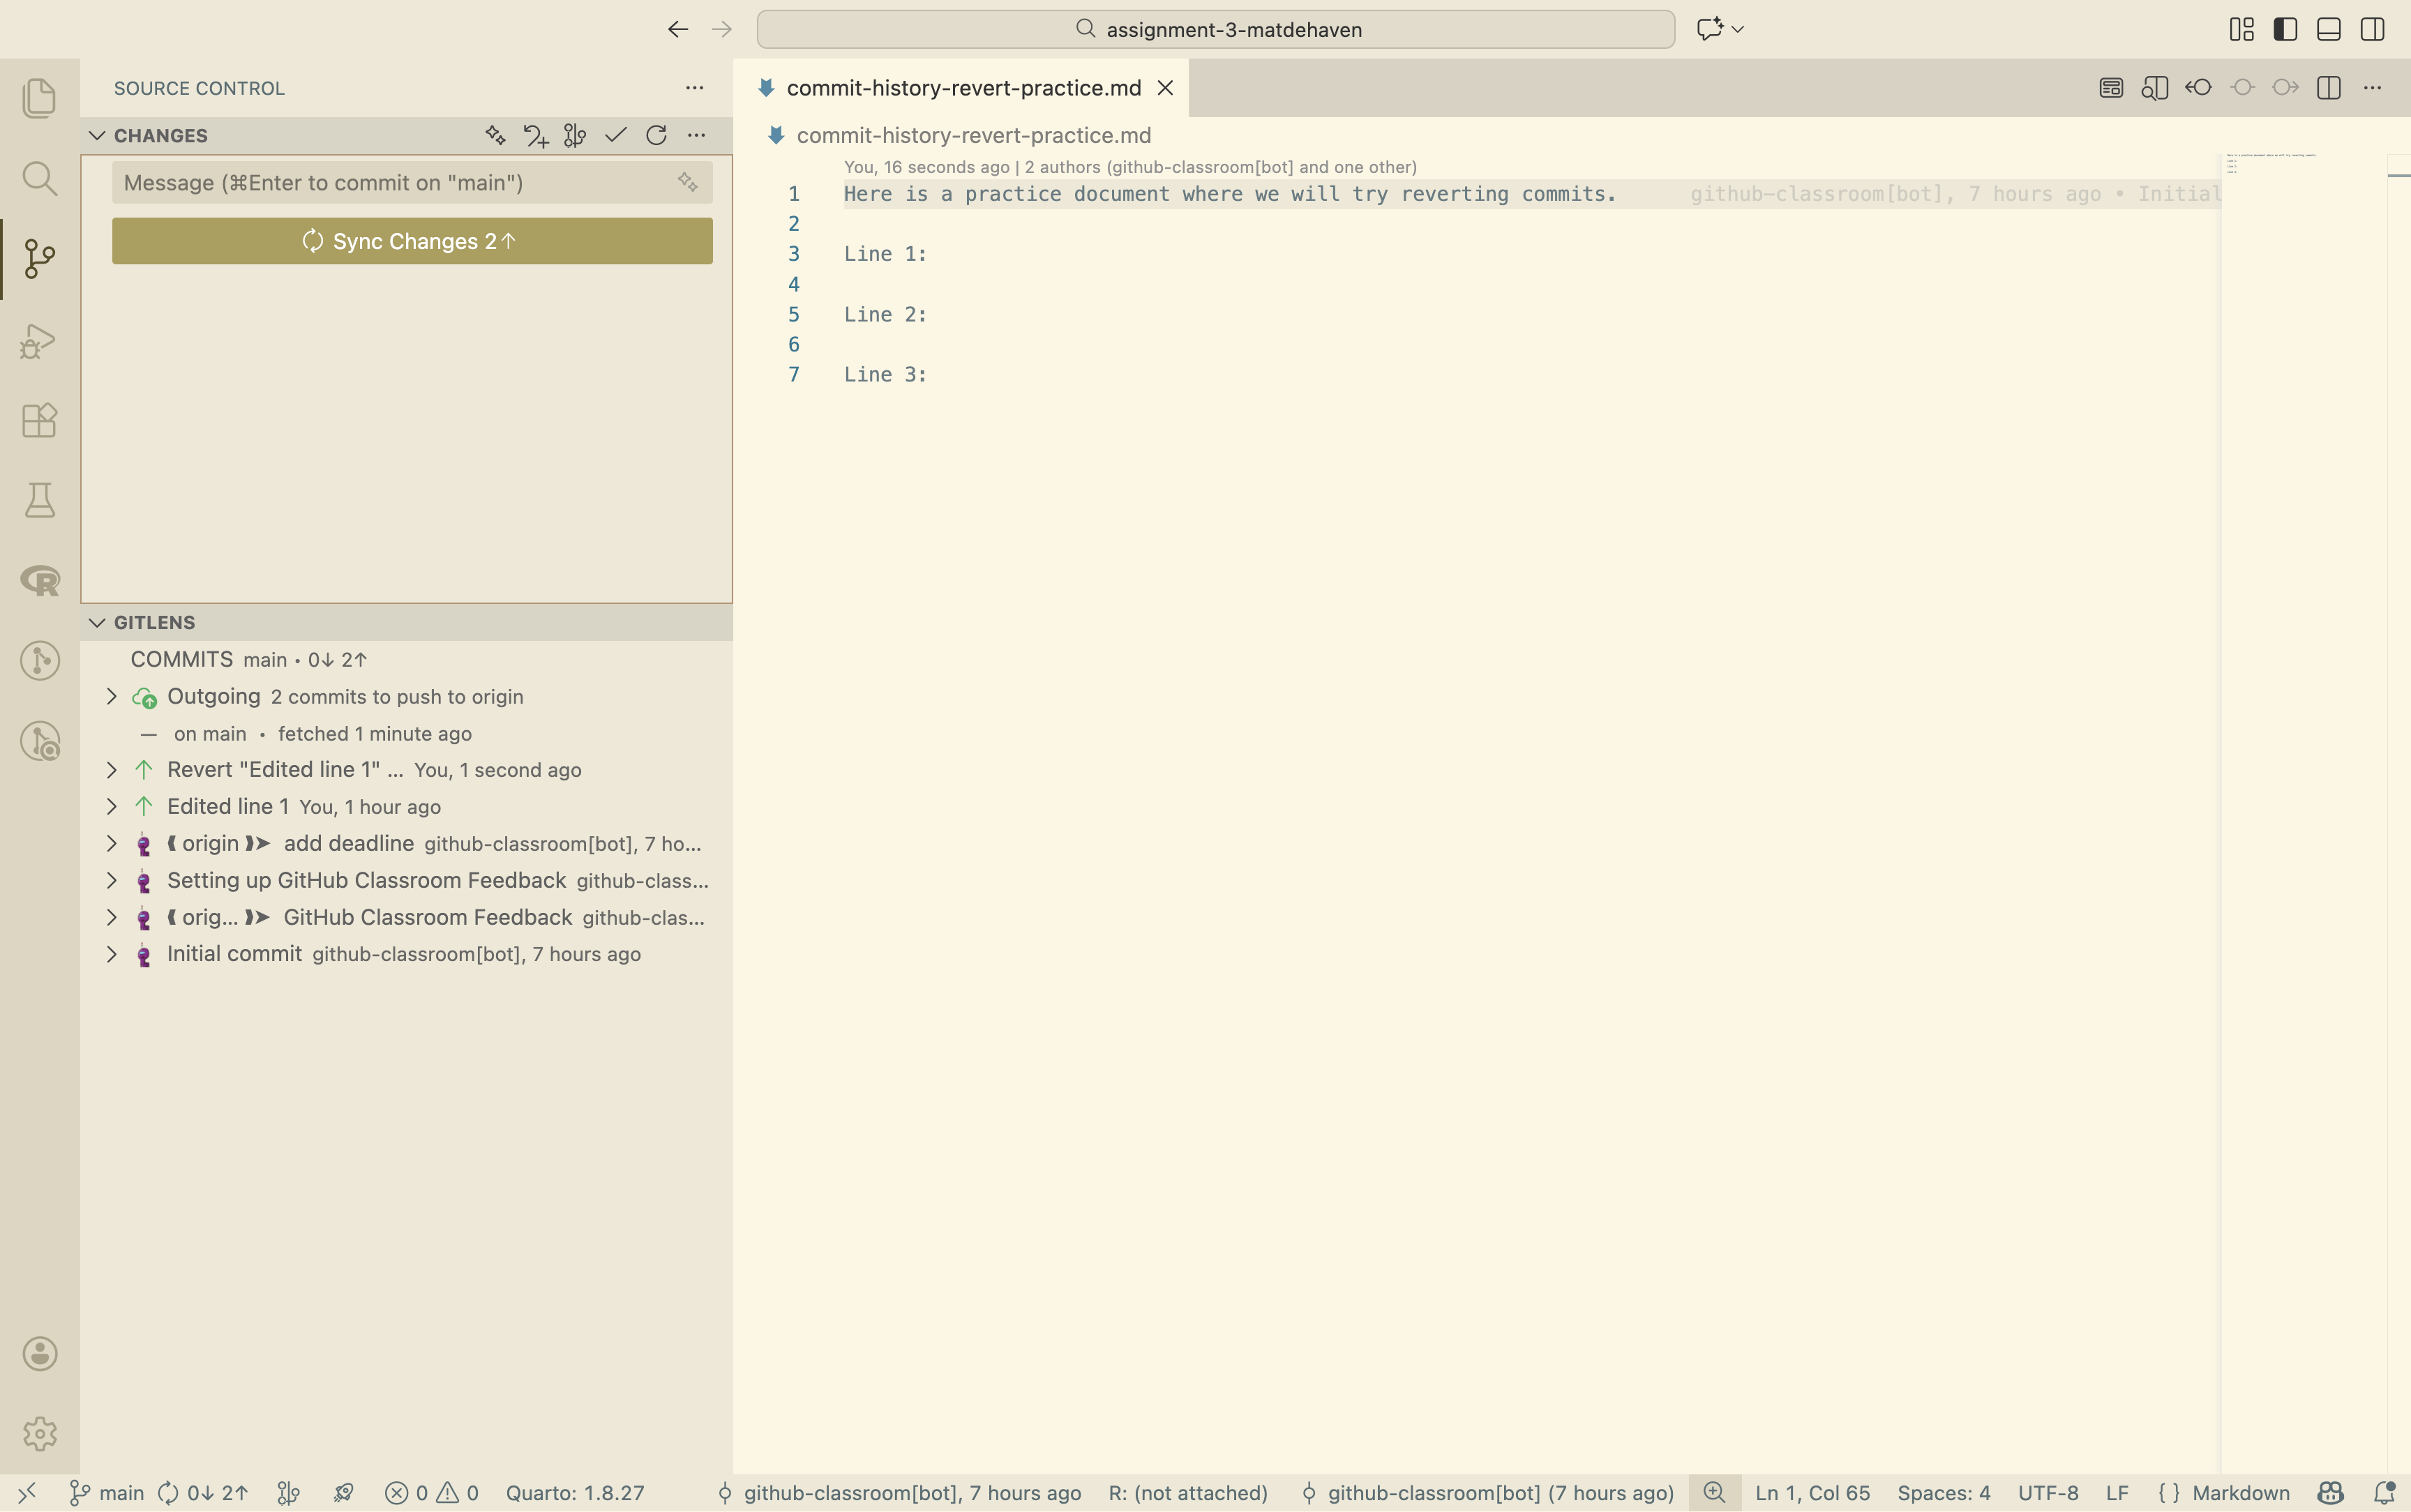
- Right click on the “Edited Line 1” commit in the commit history and select “Revert Commit” then the first option, “Revert --no-edit”
You should see two changes,
- Whatever line you added in that commit has been removed
- There is a new commit in the commit history called “Revert ‘Edited Line 1’”.
I set up this example so that the commit “revert” would be easy. However, often you will find that you cannot simply revert your commit in one click of a button because you have edited over those lines of code multiple times. Git then isn’t sure if you want to revert all the way to the past commit for every line, or just some of the lines, and so you will be prompted to resolve a “merge” conflict where you decide which lines of code to keep and which to discard.
In addition, if your commit history no longer agres with your remote repository (e.g. GitHub), you will need to “force push” your changes to the remote repository. This overwrites the remote repository with your local repository, so you should be very careful when doing this.
3 Readings
- Read Code and Data for the Social Sciences: A Practitioner’s Guide by Matthew Gentzkow and Jesse M. Shapiro2. ~ 40 pages, with generous spacing
2 Jesse used to teach at Brown and was involved in starting this course.
This is perhaps the best distillation of the goals of this course. You will see many of the topics we have covered in the lectures so far. In particular, this week’s lecture on GitHub Projects is very related to the problems detailed in Chapter 8: Management.
- Explore Gentzkow and Shapiro’s public RA manual
- Make sure to read the “Setup”, “Workflow”, and “Details” (under Workflow) pages
The RA Manual describes in detail how they manage assigning tasks, developing code, reviewing, etc for their lab. I am not expecting you all to follow these procedures, but I want you to see an example of what a well-organized research group expects.
4 Reaction
Create a new file in your repository called “reaction.md”.
- Write a paragraph (or a few bullets) about your takeaways from the “Code and Data…” reading.
You should include…
- Something new you hadn’t thought about before?
- Something you will try in your own projects?
- Something you disagree with?
- Something that was confusing or unclear?
I will also ask in the next class for you to share a highlight from the reading.
5 Submit
- Commit and Push to GitHub!