msg = "Hello World!"
print(msg)
Hello World!This is a guide for installing and setting up Python to use with Visual Studio Code.
If you do not already have VS Code installed, install it here.
If you are on macOS, I would recommend using homebrew instead, and installing python with the following command:
terminal
brew install pythonIn VS Code, we need to install an extension to support Python.
This is done most easily from within VS Code, by clicking on the “Extensions” tab and searching for “Python”.
This extension will also install the extensions for the Python Debugger and Pylance—Pylance provides autocomplete support.1
1 Python is named after the British comedy group Monty Python. “Pylance” is a reference to Lancelot.
Open a new folder in VS Code for this example.
VS Code should automatically recognize this is a Python file and automatically attach a Python “Interpreter”. This interpreter should be the version of Python you just installed.
If you already had prior versions of Python installed, it may default to one of those instead.
You can then choose a different version of Python, if you have multiple installed.
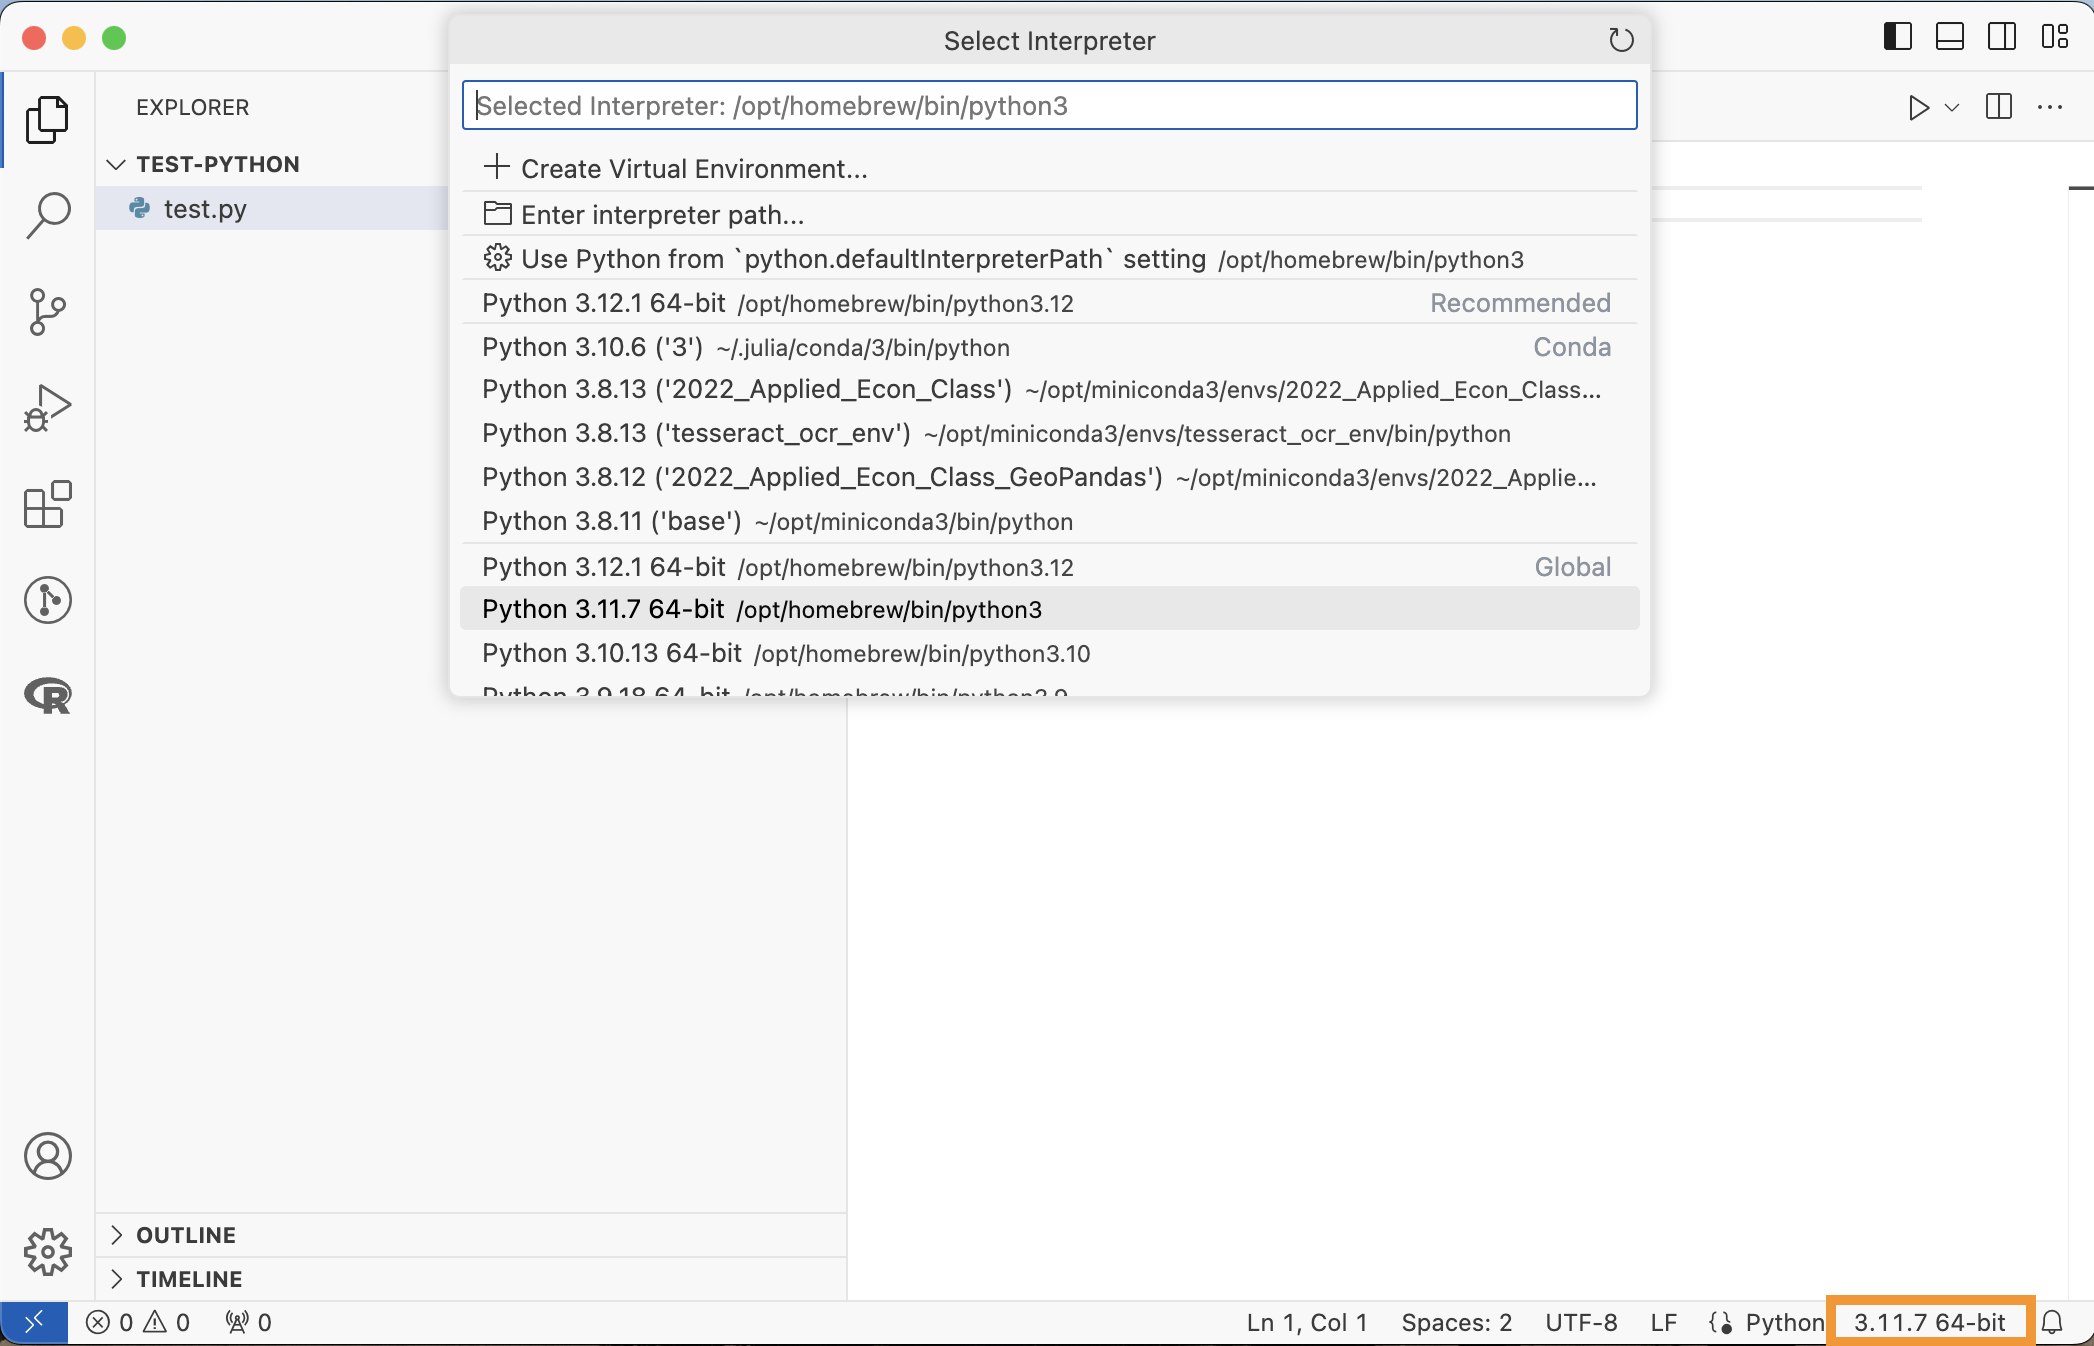
You can see that I have a few different versions of Python installed (3.12.1, 3.10.6, 3.8.13, …) that all live in different locations. If you just installed Python for the first time, you will only see that one option. Click “esc” or select an interpreter to exit this menu.
msg = "Hello World!"
print(msg)Hello World!You have two main options for running the Python Code:
Run the whole file: Click on the “Run” arrow button at the top of the VS Code window
Run the current line or selection: hit Shift+Enter
Option 2 tends to be better for editing and iterating on code. Notice that it starts a live Python session in the therminal (by calling your Pyton Interpreter). You can tell it’s a Python terminal by the prompt: >>>. You may see this called a Python “REPL” which stands for “read-eval-print loop” and is simply an interactive terminal.
Environments are important to keep the packages installed for each project separate. Also, for some installations of Python, it is now difficult to install packages system-wide as a way to enforce/encourage the use of environments.
There are a few different options to create environments for Python. VS Code makes it easy to either use conda or venv.
We will use venv as it comes with the latest Python installs. But if you have used conda before, it is also a fine option.
Shift+Cmd+P), and select “Python: Create Environment…”, then select “Venv”At this point, you should get a dropdown that shows all of your available Python installations. If you just installed Python, you may only see one option.
VS Code has now created an environment named “.venv” in our workspace. You can see the new file in the explorer.
You should see the package “pip”.
You need to restart your Python terminal after launching the environment if it was still running. You should notice the new one launches this particular ‘.venv’ environment.
Python packages (also called “modules”) are managed by pip which stands for the recursive name “pip installs packages”.
pip manages package installs from the command line not from within Python. This is different than R and Julia.
Start a Command Line terminal in VS Code (Open Command Palette, then select “Terminal: Create New Terminal”)
Install the Python package numpy
terminal
pip install numpynumpy will be added to list of packages in “.venv/lib/”.
import numpy as np
a = np.arange(10)
print(a)
[0 1 2 3 4 5 6 7 8 9]There are a few ways to import Python packages in your code.
import numpy
numpy.arange(10)import numpy as np
np.arange(10)from numpy import arange
arange(10)from numpy import *
arange(10)Option (2) is what is recommended and what you will see most often. This means Python ends up being more explicit than R or Julia at keeping track of which functions come from which packages.