df <- data.frame(
  x = c(1, 5, 10, 20, 3, 4, 8, 99),
  y = c(2, 3, 8, 10, 23, 89, 200, 72),
  group = c("C", "C", "B", "C", "B", "B", "A", "A")
)Assignment 2: R Basics
1 Accept Assignment on Github Classroom
Clone this assignment to your computer. 1
1 See Assignment 1 if you need a refresher on these steps.
2 Install GitLens Extension
We are going to use the GitLens extension to provide us with even more Git interfacing within VS Code.
- In VS Code, go to extensions, and install “GitLens — Git Supercharged” made by GitKraken.
You can read on the install page about some of the features and they have some example videos to watch as well.
We will use GitLens at the end of this assignment to look at our revision history.
Optional
Some of the features of GitLens require a paid account to work with private repositories (all of the features work for public repositories). Luckily, you can get free access as part of the Github Student Developer Pack. I’d suggest going ahead and applying for the student pack (you have to submit a photo of your student ID) once that is approved (takes up to a few days) you can log into GitKraken using your Github account and have access to all of the GitLens features for every repository.
3 Subsetting data.frames
Open up the file “r-basics-dataframes.r” and you should see the following data.frame:
Subset this data.frame using the following methods (add your code to the “r-basics-dataframes.r” file):
- Subset the 4th row, 2nd column element using numerical indexes
- Subset the 4th to 7th row, 2nd column elements by passing a vector of numerical indexes
We can also subset a data.frame by using a vector of booleans (TRUE/FALSE values) that are the same length as the number of rows (or columns if subsetting columns).
- Write a logical test for if the “group” column equals ‘B’
- Use that expression to subset the data.frame on rows, and the 2nd column
- Take the average of all of the “y” values for which the “group” equals ‘C’
4 Factors
Factors are another data structure that we mentioned but did not cover in class.
Use the following code to create a factor using the values from our data.frame.
my_factor <- factor(df$group)Print the factor. What new information do you see?
Call
str()onmy_factor. What do you notice about the stored values?
Factors supply ordering to string variables. This is very useful for data such as the responses to a survey: i.e. “Very Good”, “Good”, “Neutral”, “Bad”, “Very Bad”.
Check the documentation for
factor. What are the other arguments that can be prodvided?Use the levels argument to pass a new set of levels, including a level “D” which is not in the data.
my_factor2 <- Print the factor, note the additional level.
- Use the levels argument to pass a new set of levels, with only “A” and “B”.
my_factor3 <-Print the factor. What happened to the “C” observations?
Sometimes you want to pass an explicit ordering of levels to construct a factor.
- Using the documentation, create a factor with levels ordered as B < C < A.
my_factor4 <- - Find the function for sorting vectors, and use that one each of your factors (
my_factorX) and on the vectordf$group.
5 Loops
Open up the script “r-basics-loops.r”.
A Bad While Loop
Go ahead and run the first
while(){}loop. Yes, it will go on forever, printing out a “.” every second.Find the button to kill this R terminal in VS Code. 2
2 It looks like a trashcan.
Sometimes you will have run away processes like this where they were coded poorly. Or you realize your code will finish in 2 weeks and you should probably find a more efficient method.
- Change the “TRUE” value in the
while(){}loop to FALSE so it won’t run.
Writing a For Loop
The next exercise is going to ask you to write your own for(){} loop and if(){} statements.
I have written the following code that randomly draws 10000 times from the Normal distribution and stores the result in variable x.
set.seed(42)

x <- rnorm(10000)
groups <- rep(NA, 10000)
The set.seed() function makes random draws reproducible so we will all draw the same random 10000 numbers.
- Write a for loop that traverses each element in
xand assign a group to same the index in the vectorgroupsbased off of the following rules:- Assign group ‘A’ if the value is in \((-\infty, -2)\)
- Assign group ‘B’ if the value is in \([-2,-1)\)
- Assign group ‘C’ if the value is in \([-1,0)\)
- Assign group ‘D’ if the value is in \([0, 2)\)
- Assign group ‘E’ otherwise
There are much better ways to code this type of task, but we are practicing for loops and if statements.
Tip
While it is simplest to iterate over the values in x, it is often much more convenient to loop over the indexes.
- Run
table(groups), you should get the following result:
table(groups)groups
A B C D E
236 1412 3385 4742 225 6 Git Revert
We will now see how we can
- View the file history for each commit
- Revert individual commits
This will be the beginning of editing our commit history.
Setting Up a Git History
We will emulate a few git commits in order to use for practice.
First, make sure you have saved and commited all of your work from previous steps
Open up the “commit-history-revert-practice.md” document.
Then, one at a time
- Add a line of text to “Line 1:”
- Stage the commit, write a message “Edited Line 1”, and commit it
- Repeat for lines 2 and lines 3
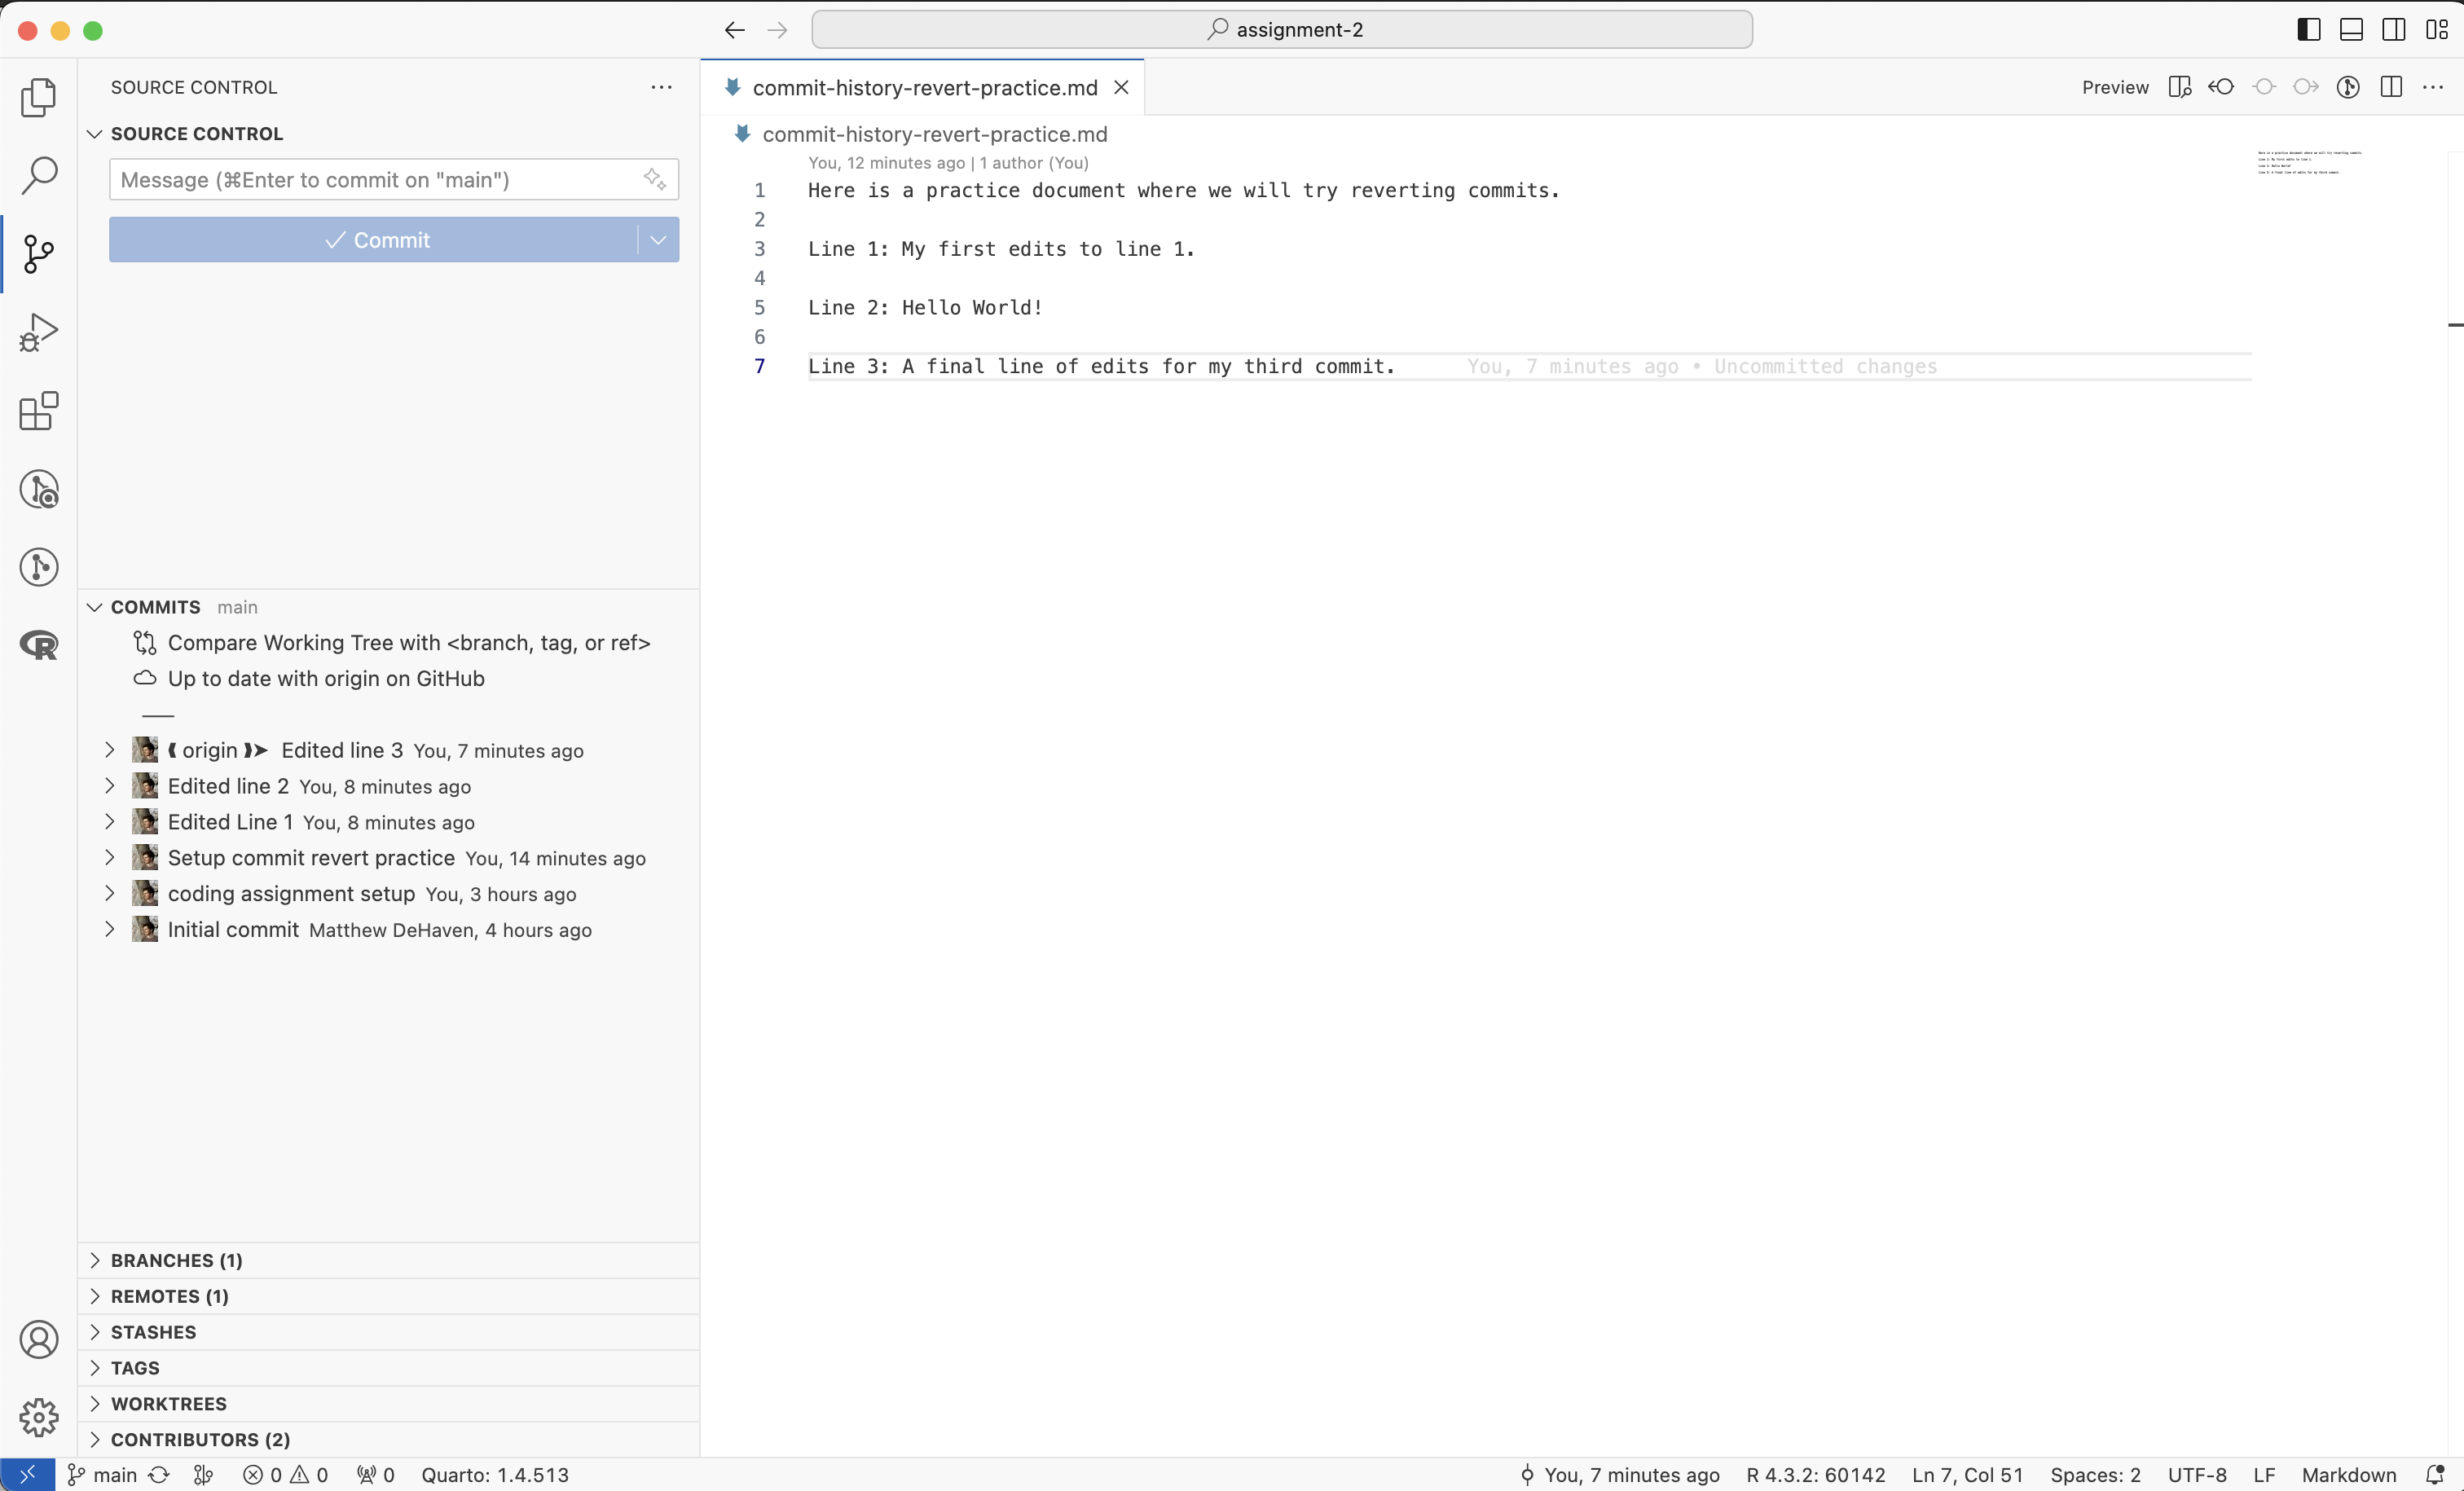
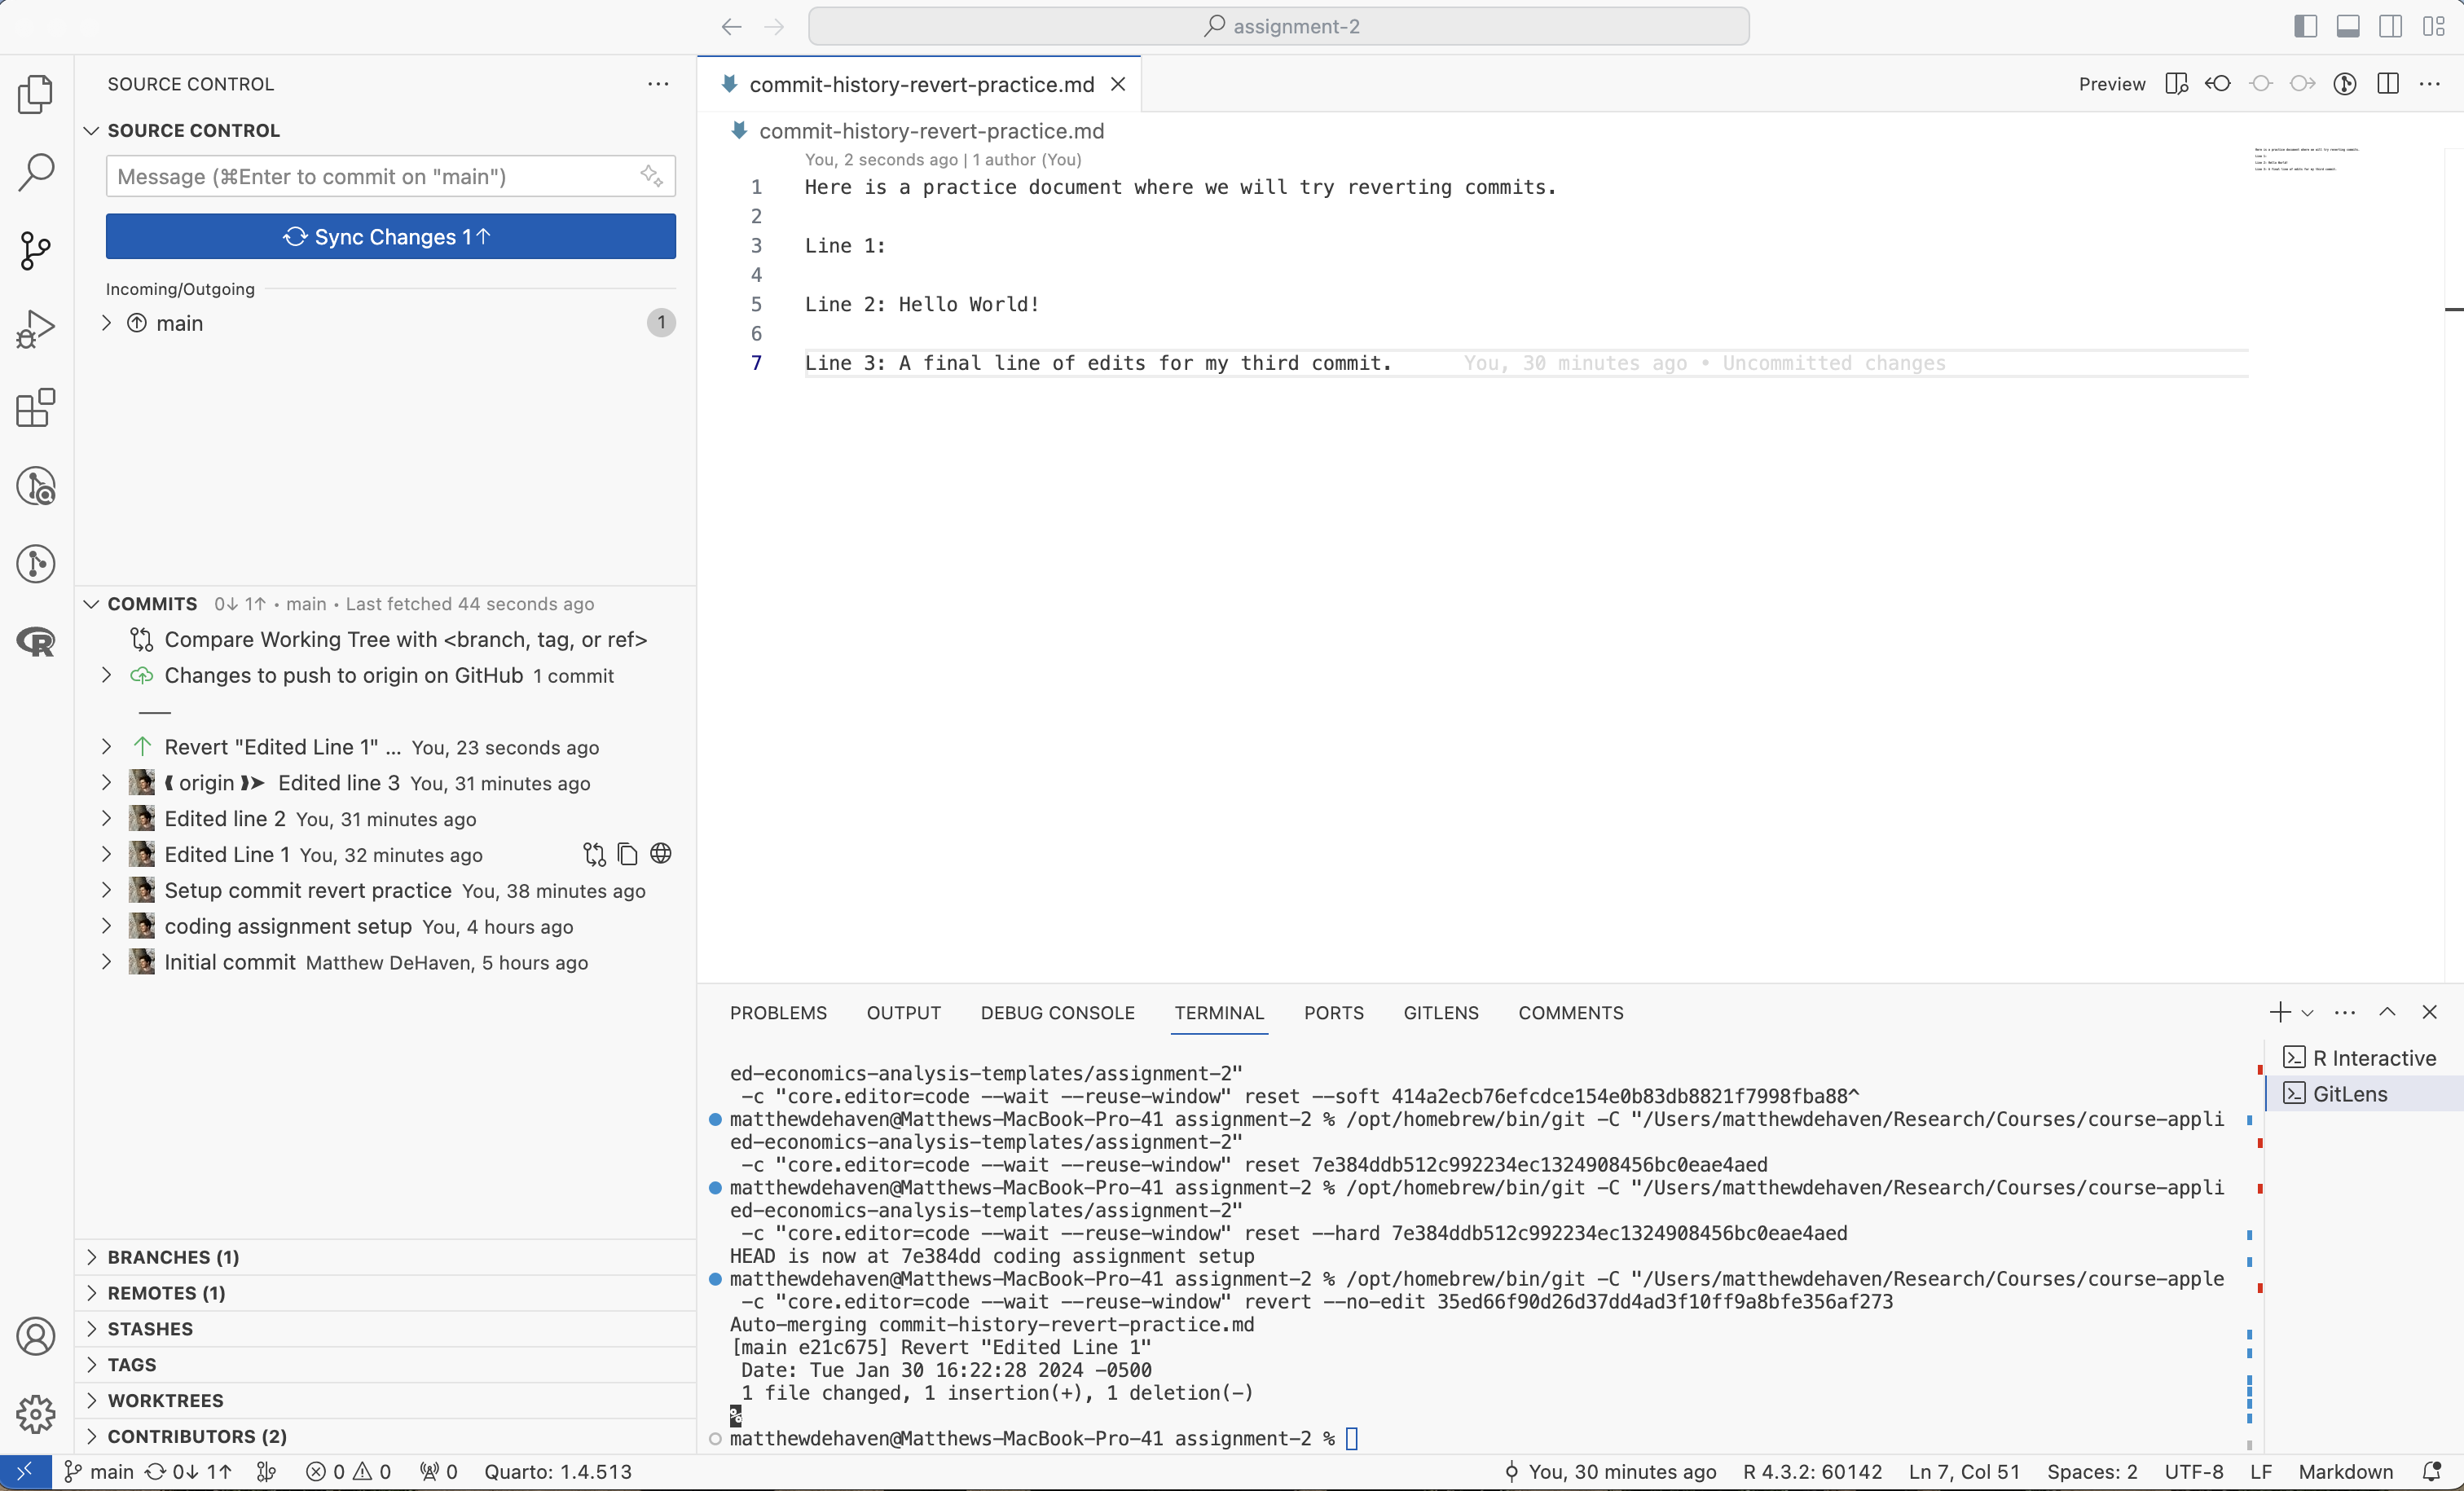
Now, open your commit history by going to the “Source Control” tab in the activity bar and expanding the “Commits” menu at the bottom of the tab. 3
3 This was added when you installed GitLens, so if you have not done that please do so now.
You should now have a commit history that looks something like this:
Looking at your Git Changes
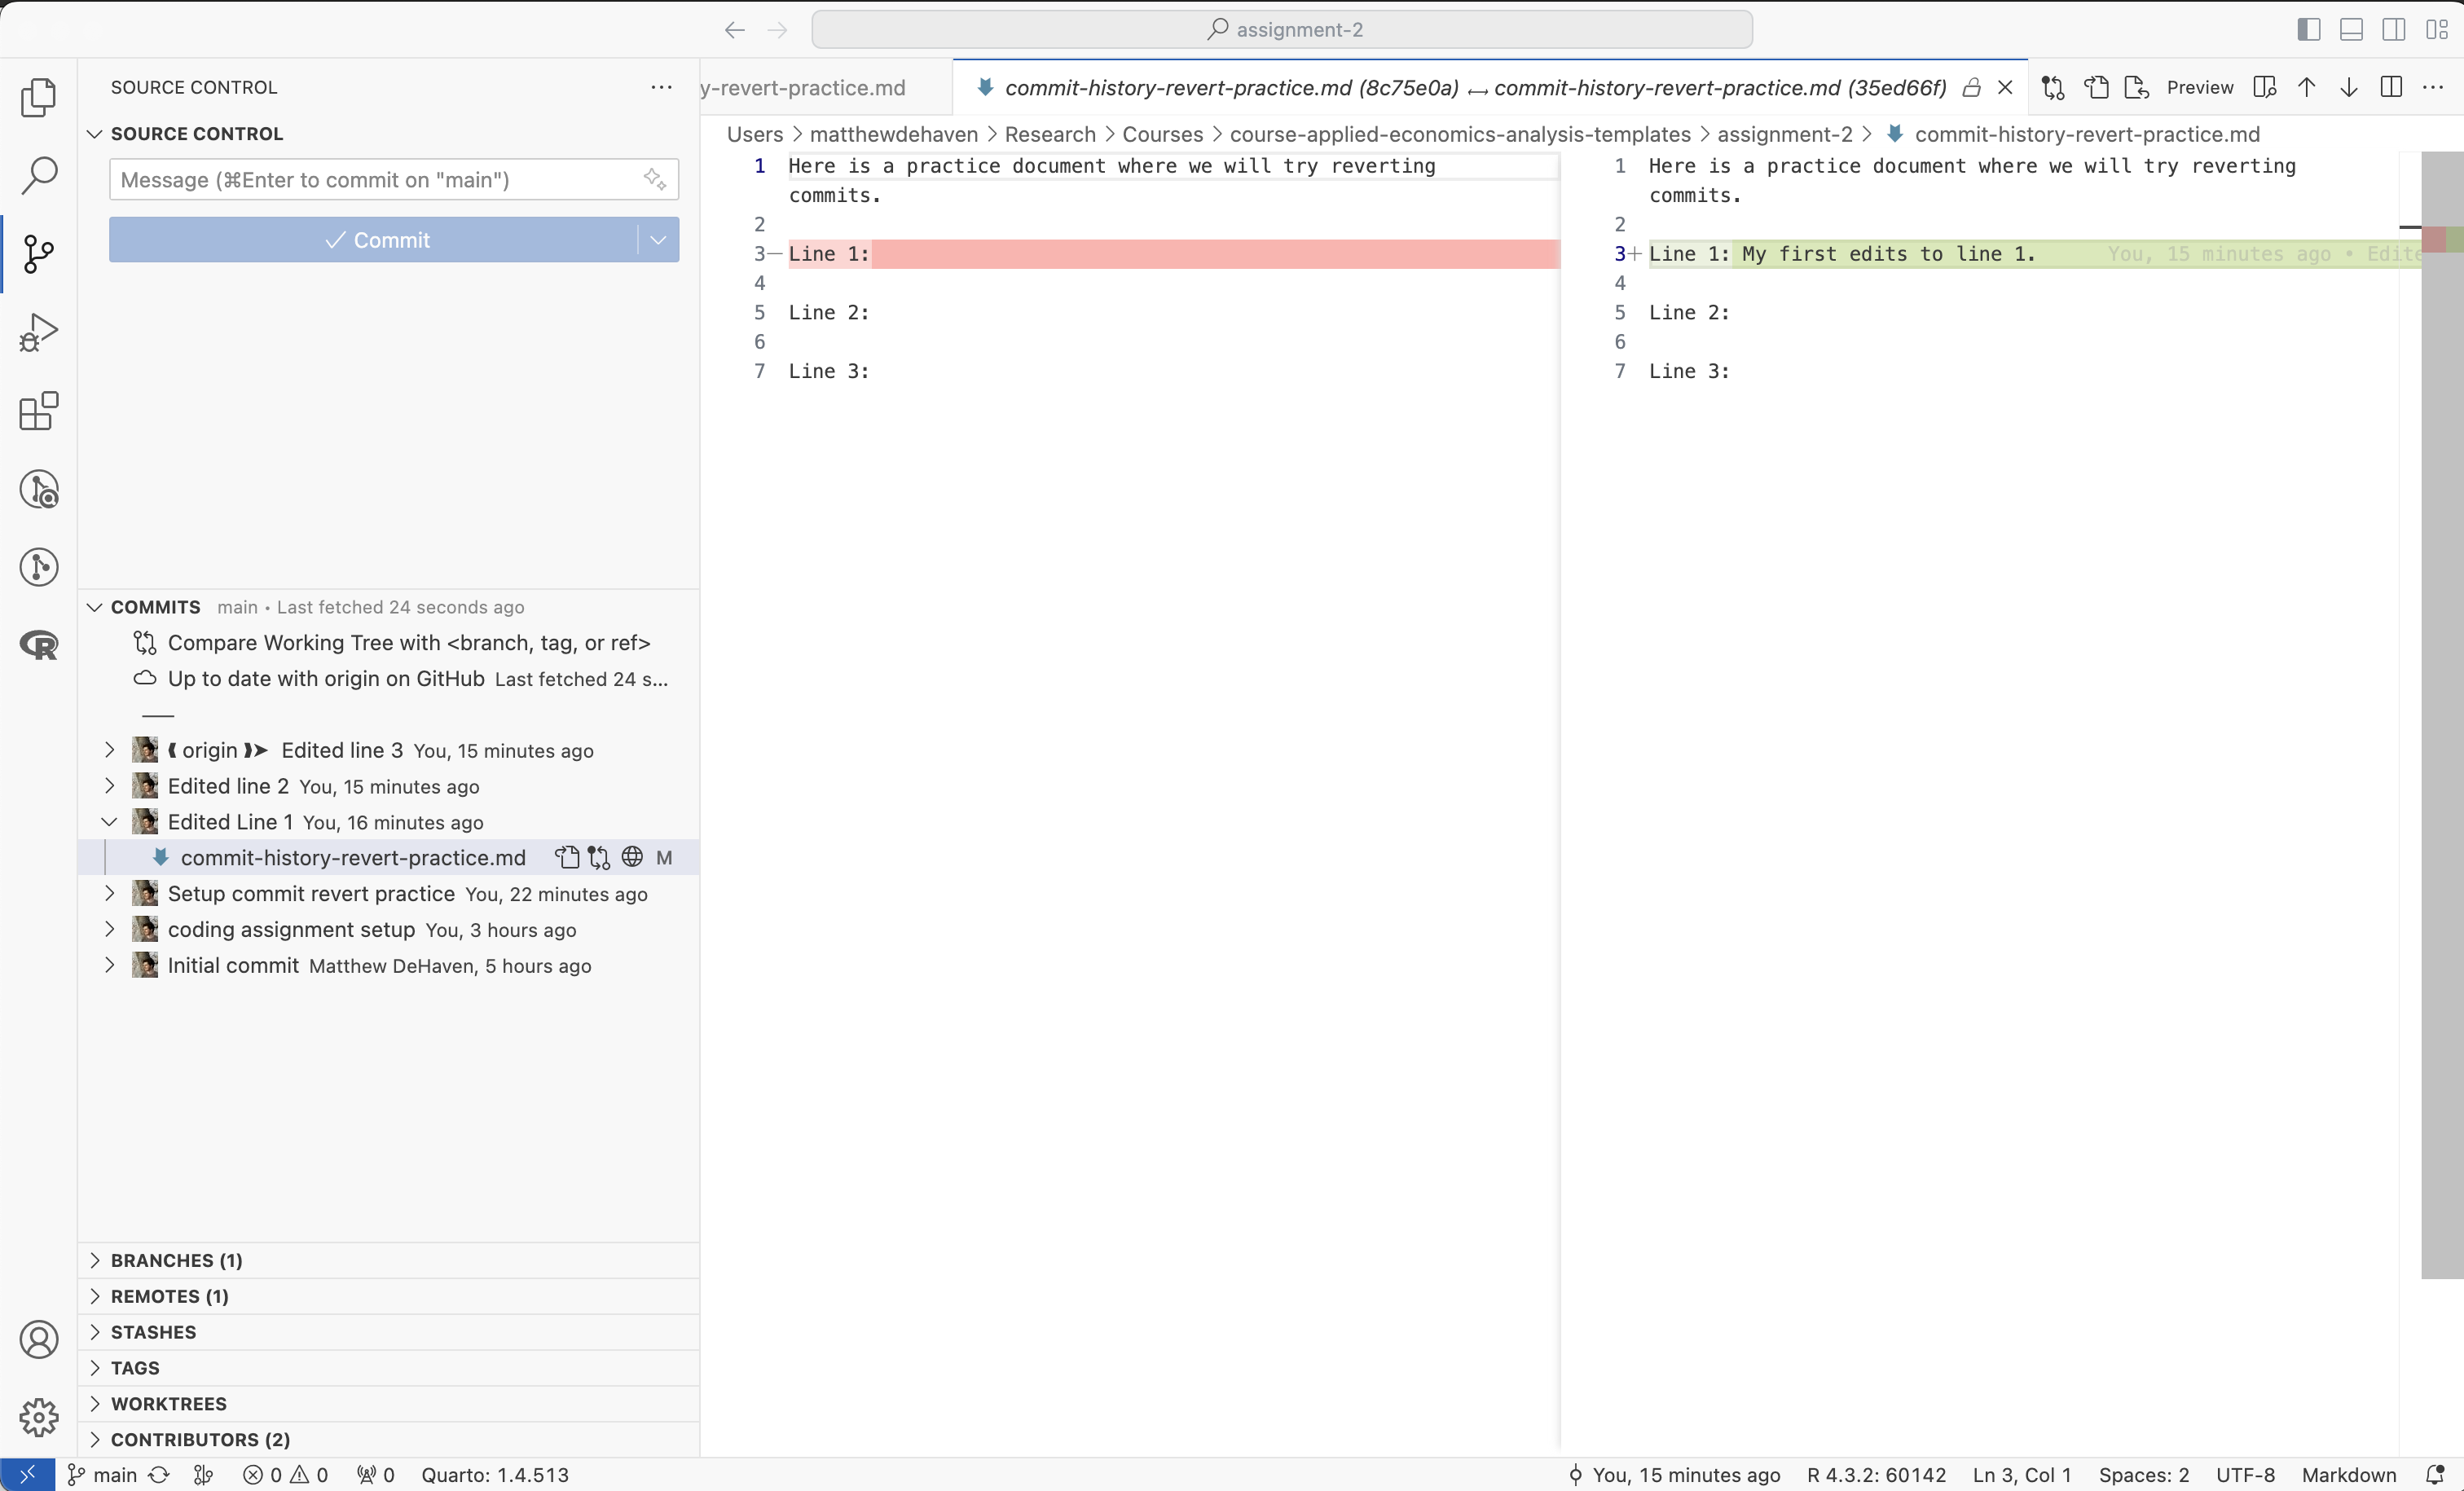
Click on the first commit “Edited Line 1” in the commit history.
You should now see a dropdown with the file we changed, click on the file.
This should open the following view of the changes made during that commit:
- Go ahead and open up any of the other git commits, and click on their files to see the changes.
The changes that we are currently seeing are between the commit we click on and the commit before it. It can be useful instead to see the difference between a commit in the past and our current state of the project.
- Click on the 2nd icon on the file “Open Changes with Working File”.
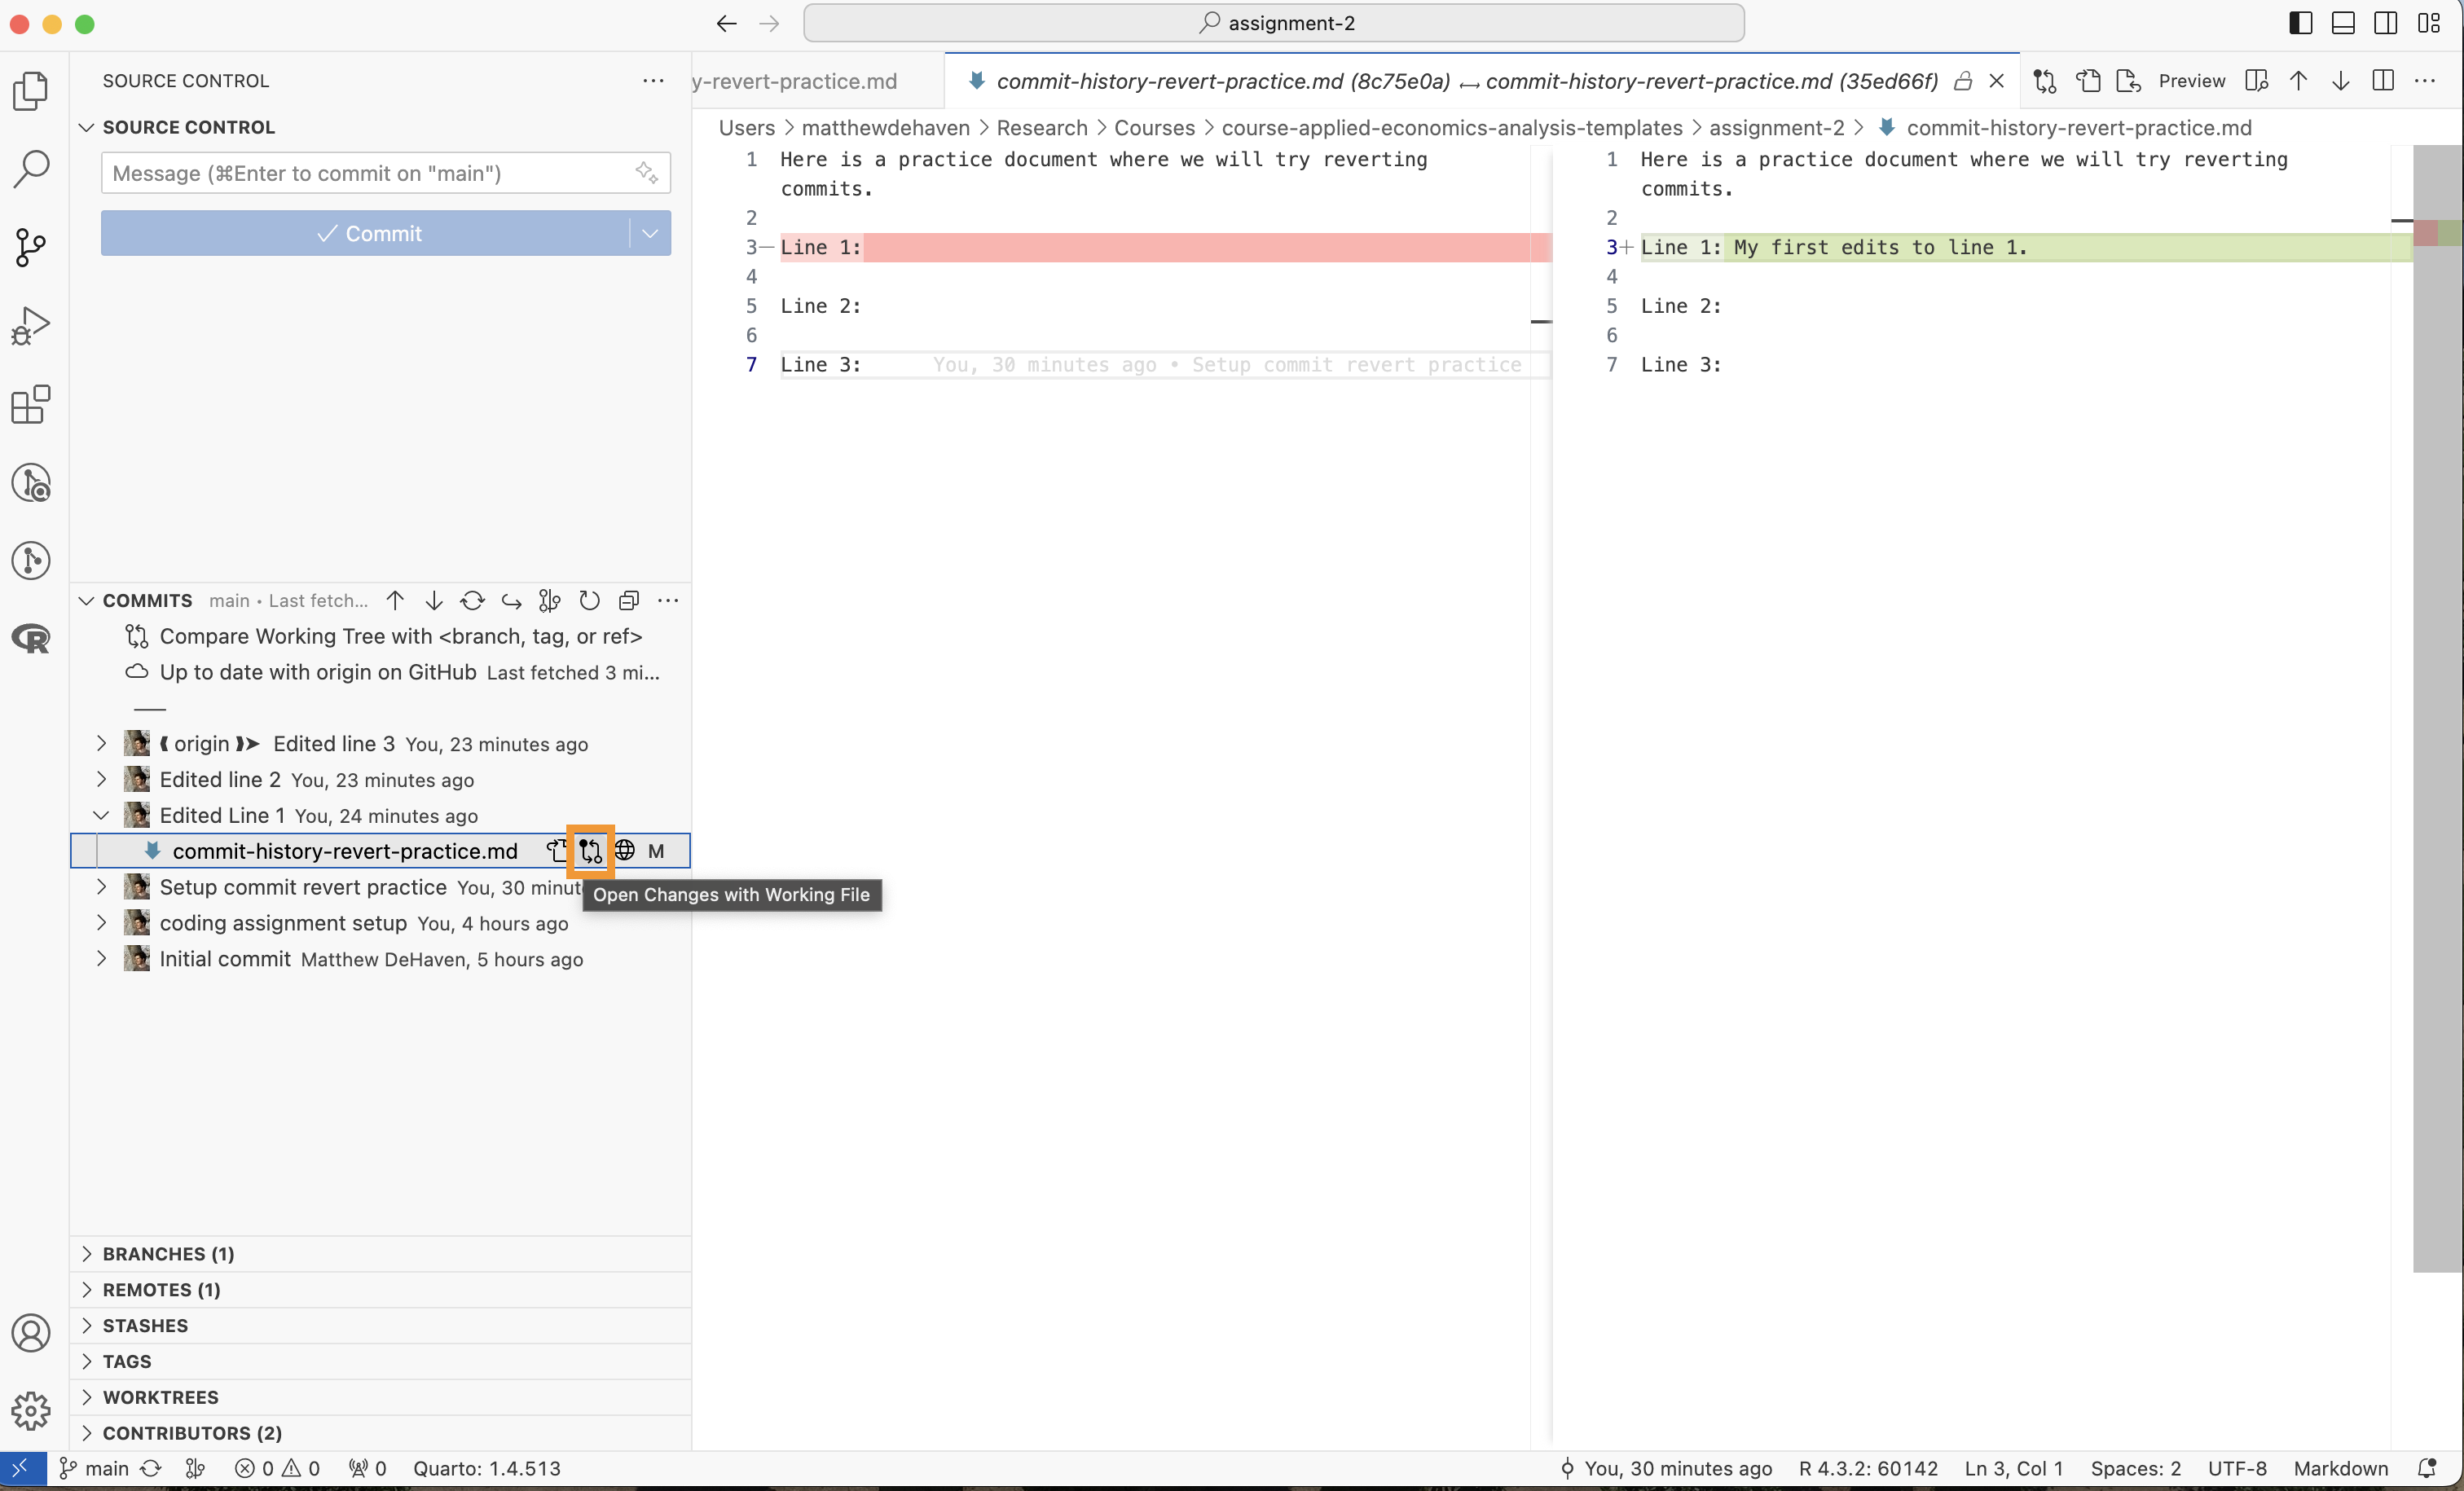
This will now display all of the changes between that commit on the left and the current state of the project on the right.
Reverting Commits
There are many ways to edit a commit history.
One of the most straightforward and safest methods is to “revert” commits.
This simply adds a new commit to our current project that is the inverse of the changes made in a past commit.
Close all of the “changes” windows and just open the current file “commit-history-revert-practice.md”
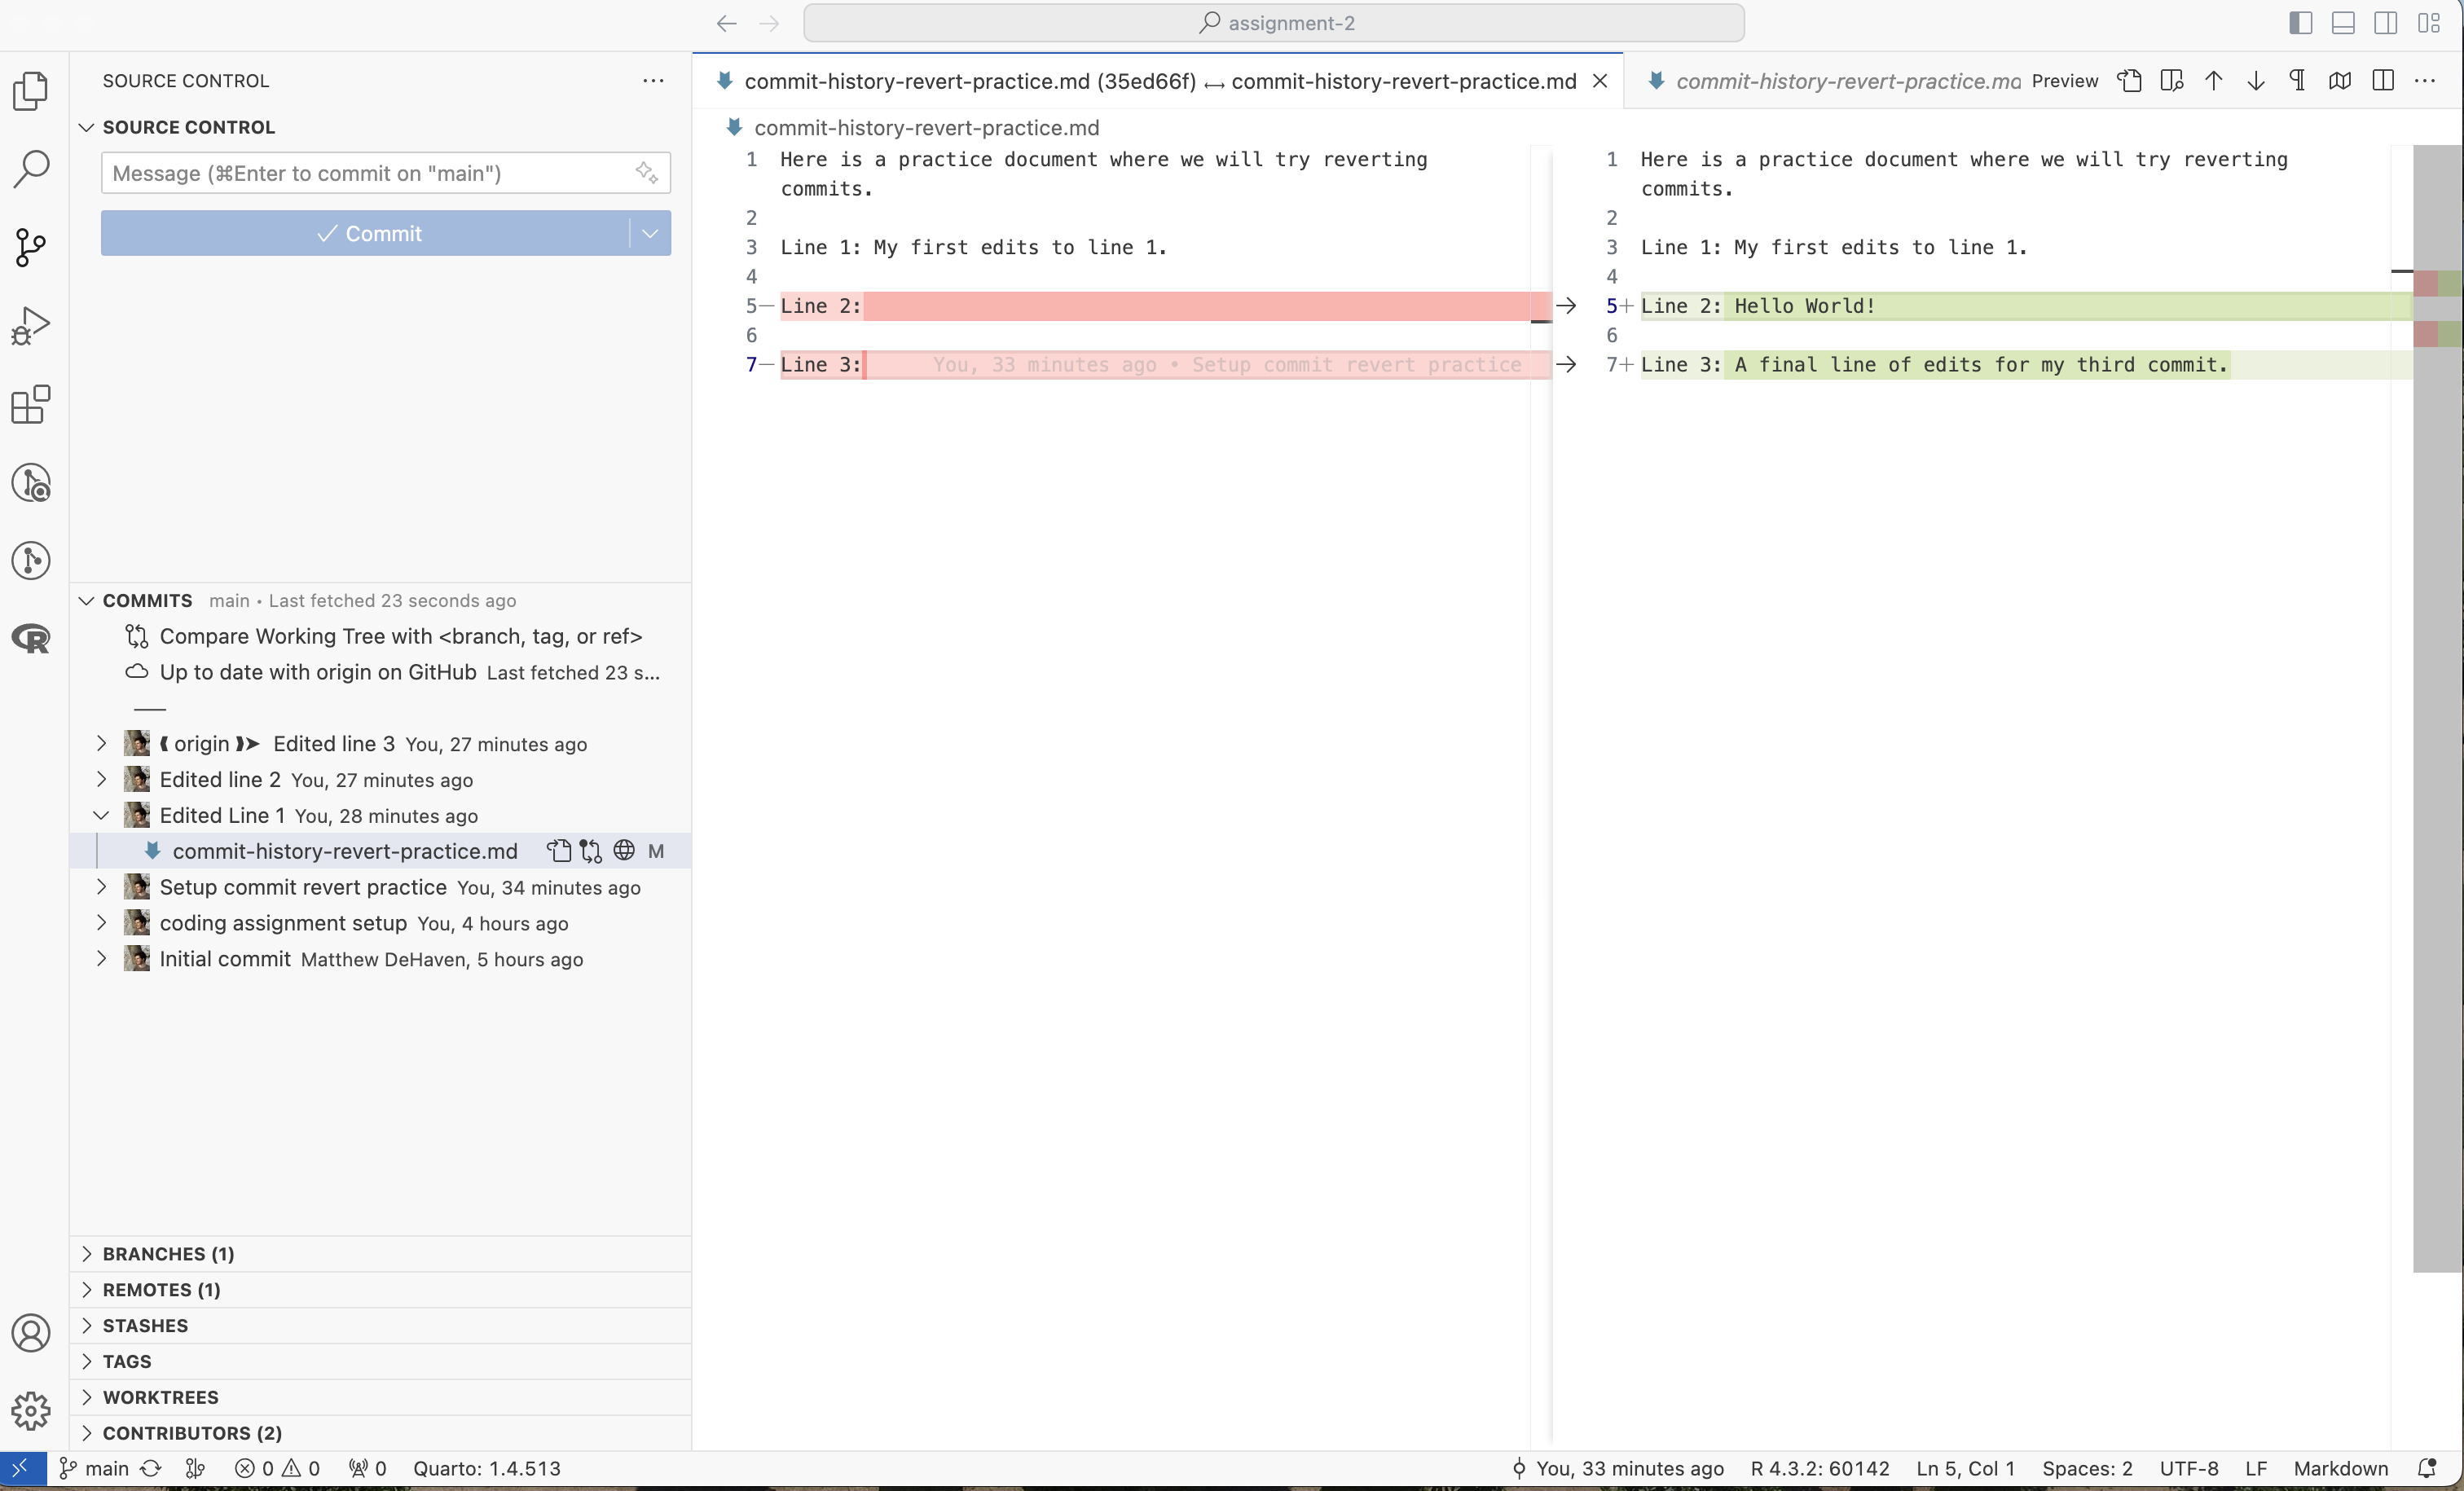
Right click on the “Edited Line 1” commit in the commit history and select “Revert Commit” then the first option, “Revert --no-edit”
You should see two changes,
- Whatever line you added in that commit has been removed
- There is a new commit in the commit history
Important
I set up this example so that the commit “revert” would be easy. However, often you will find that you cannot simply revert your commit in one click of a button because you have edited over those lines of code multiple times. Git then isn’t sure if you want to revert all the way to the past commit for every line, or just some of the lines, and so you will be prompted to resolve a “merge” conflict where you decide which lines of code to keep and which to discard.
7 Markdown Assignment
Make some simple edits to the readme for this homework assignment to include:
A link to Brown Economics homepage
A picture4
A list of three professors in Economics
A coding block with
print("Hello World")
4 You can either link to one online or include the file in the repository
Make sure to commit and push all of your final changes!