Unit Tests & GitHub Actions
Testing our code in a systematic way
April 7, 2025
Lecture Summary
- What are unit tests?
- Using unit tests in R
- in packages
- in projects
Unit Tests Overview
What is a unit test?
Unit tests…
- take a unit (small piece) of code,
- run it,
- and test if the result matches what is expected.
Unit tests are a programming methodology/framework where each test runs on the smallest possible portion of the code, so the errors tell you exactly where something went wrong.
Why unit tests?
Remember back to the start of the course, we motivated writing programming scripts as a replacement for point-and-click software?
Unit tests take this one step farther.
- When you merge two data.frames, you print them out to make sure the merge worked
- Instead, you could write a unit test that expects a data.frame of a certain size (or maybe no
NAvalues)
Unit Tests Formalize Current Habits
I want to emphasize this,
- you already test your code all the time;
- you just do it on the fly.
When you find yourself testing for the 3rd time by hand if one of you merges worked, you should consider writing a unit test for it instead.
Unit Tests for Packages
Unit tests are most often used for packages.
- Each function you write should have at least one unit test.
- verify the function gives the correct result for a few simple cases
- make sure it gives errors on likely mispecified arguments
- etc.
Unit Tests for Research Projects
But I think unit tests are incredibly useful for research projects as well:
- Test if your data has missing observations
- Test if your regression results are within a certain range
- Test if your output plots are non-empty
- etc.
You can then easily rerun all of your tests whenever you update your raw data, or change a step in the analysis.
testthat package
Install testthat
In R, the best package for unit tests is testthat created by—you guessed it–Hadley Wickham.
Notice that we set the “edition” of the package after loading it. This is because so many packages relied upon testthat edition 2 they couldn’t deprecate all the functions they wanted to change, so they made an edition 3 (which is what we will use).
Expecting Results
The basic element of testthat unit tests are the expect_ family of functions.
Which didn’t return anything. It only returns something on an error.
And this is the goal of unit tests, throw a helpful error when the result isn’t expected.
Expecting TRUE/FALSE
A couple of very useful expectations are
These work with logical conditions, which make it easy to write your own expectations.
When you do this the error messages are less helpful, so it’s better to use a pre-built expect_() function if you can.
Expecting Identical
If you want to check if two numbers are equal, you can use,
If you want to check if two numbers are exactly equal, you use
Expecting Types
It can be useful to expect a certain data type.
Error: "hello" has type 'character', not 'double'.Expecting Warnings and Errors
Sometimes you will want to expect an error.
Testing Our Own Function
Let’s write a very basic function and some tests for it.
And some things we could test:
And for a test that does not pass:
We’d expect an error when given vectors of different length, but R tries to fix this for us and duplicates values to make them the same length and just throws a warning.
Making a Unit Test
We now have a group of expectations we would like to run for our function.
Let’s make our first “unit” test.
test_that("rmse works for various vectors", {
expect_equal(rmse(c(1,2,3), c(2,2,2)), 0.816, tolerance = 0.01)
expect_equal(rmse(c(0,0,0), c(10,10,10)), 10)
expect_true(is.na(rmse(c(1,2,NA), c(1,2,3))))
})Test passed And we passed!
- First Argument: “string” with a name for the test
- Second Argument: {code} block with one or more
expect_()functions
Making a Unit Test that Fails
Let’s go ahead and add our expectation that failed.
test_that("rmse works for various vectors", {
  expect_equal(rmse(c(1,2,3), c(2,2,2)), 0.816, tolerance = 0.01)
  expect_equal(rmse(c(0,0,0), c(10,10,10)), 10)
  expect_true(is.na(rmse(c(1,2,NA), c(1,2,3))))
  expect_error(rmse(c(1,2), c(1,2,3)))
})
-- Warning: rmse works for various vectors -------------------------------------
longer object length is not a multiple of shorter object length
Backtrace:
x
1. +-testthat::expect_error(rmse(c(1, 2), c(1, 2, 3)))
2. | \-testthat:::quasi_capture(...) at testthat/R/expect-condition.R:126:5
3. | +-testthat (local) .capture(...) at testthat/R/quasi-label.R:54:3
4. | | \-base::withCallingHandlers(...) at testthat/R/deprec-condition.R:23:5
5. | \-rlang::eval_bare(quo_get_expr(.quo), quo_get_env(.quo)) at testthat/R/quasi-label.R:54:3
6. \-global rmse(c(1, 2), c(1, 2, 3)) at rlang/R/eval.R:96:3
7. \-base::mean((actual - predicted)^2)
-- Failure: rmse works for various vectors -------------------------------------
`rmse(c(1, 2), c(1, 2, 3))` did not throw an error.Error:
! Test failedFixing Our Function
Let’s fix our rmse() function to throw an error for mismatched vectors.
Now we can rerun our test.
🎉
testthat Overview
We have seen how to write individual unit tests using testthat package.
- Each unit test consists of one or more
expect_()functions
Now we will look at two ways to store and run all of our unit tests in…
- a package
- a project
We will look at a package first, as this is the most natural location for unit tests.
Unit Tests for a Package
Setting up Unit Testing for an R Package
We saw before how you can use the tools from devtools and usethis to quickly create an R package.
For instance, you can create a package in the current folder using,
Now, if we want to use testthat for our package, simply run
✔ Adding 'testthat' to Suggests field in DESCRIPTION
✔ Adding '3' to Config/testthat/edition
✔ Creating 'tests/testthat/'
✔ Writing 'tests/testthat.R'
• Call `use_test()` to initialize a basic test file and open it for editing.What use_testthat(3) Added
What files and folders were added to our package?
- “tests/testthat/” folder
- Where our tests will live
- “tests/testthat.r”
- auto-generated R script that will run all the tests we write
- “DESCRIPTION” file
- added
testthatas a suggested package and sets edition number to 3
- added
Adding a Function to our package
Before runnning any tests we need to add a function to our package.
Let’s add the rmse() function we wrote earlier to the “R/” folder:
Now that we have a function we can run the following in our terminal:
✔ Writing 'tests/testthat/test-rmse.R'
• Modify 'tests/testthat/test-rmse.R'This creates a new test file “test-rmse.r” and opens it for us to modify.
Modifying our test file
The test file comes with a basic test for us to edit.
We want to change
- the test “name”
- the
expect_()calls
so we can test our function rmse().
Our Test File
Let’s reuse the test we wrote earlier.
The only difference from earlier is we have now saved our function in one file, our test in another, and both are part of an R pacakge.
Running Tests in Package Development
You now have a few options to run your package tests from the terminal.
devtools::check()devtools::test()testthat::test_dir("tests")
For writing a package, options 1 and 2 are most useful.
Let’s see what the output of each looks like.
devtools::check() Output
══ Documenting ════════════════════════════════════════════════════════════════════════════
ℹ Updating prepUnitTests documentation
ℹ Loading prepUnitTests
══ Building ═══════════════════════════════════════════════════════════════════════════════
Setting env vars:
• CFLAGS : -Wall -pedantic -fdiagnostics-color=always
• CXXFLAGS : -Wall -pedantic -fdiagnostics-color=always
• CXX11FLAGS: -Wall -pedantic -fdiagnostics-color=always
• CXX14FLAGS: -Wall -pedantic -fdiagnostics-color=always
• CXX17FLAGS: -Wall -pedantic -fdiagnostics-color=always
• CXX20FLAGS: -Wall -pedantic -fdiagnostics-color=always
── R CMD build ────────────────────────────────────────────────────────────────────────────
checking for file ‘/Users/matthewdehaven/Research/Courses/course-applied-economics-analy✔ checking for file ‘/Users/matthewdehaven/Research/Courses/course-applied-economics-analysis-templates/prepUnitTests/DESCRIPTION’
─ preparing ‘prepUnitTests’:
✔ checking DESCRIPTION meta-information ...
─ checking for LF line-endings in source and make files and shell scripts
─ checking for empty or unneeded directories
Removed empty directory ‘prepUnitTests/man’
─ building ‘prepUnitTests_0.0.0.9000.tar.gz’
══ Checking ═══════════════════════════════════════════════════════════════════════════════
Setting env vars:
• _R_CHECK_CRAN_INCOMING_REMOTE_ : FALSE
• _R_CHECK_CRAN_INCOMING_ : FALSE
• _R_CHECK_FORCE_SUGGESTS_ : FALSE
• _R_CHECK_PACKAGES_USED_IGNORE_UNUSED_IMPORTS_: FALSE
• NOT_CRAN : true
── R CMD check ────────────────────────────────────────────────────────────────────────────
─ using log directory ‘/private/var/folders/wp/_szmdb513bxd6dqzmkgl5zrc0000gn/T/Rtmpc9QN1o/file2a624d0b73ee/prepUnitTests.Rcheck’
─ using R version 4.3.2 (2023-10-31)
─ using platform: aarch64-apple-darwin23.0.0 (64-bit)
─ R was compiled by
Apple clang version 15.0.0 (clang-1500.0.40.1)
GNU Fortran (Homebrew GCC 13.2.0) 13.2.0
─ running under: macOS Sonoma 14.2.1
─ using session charset: UTF-8
─ using options ‘--no-manual --as-cran’
✔ checking for file ‘prepUnitTests/DESCRIPTION’ ...
─ this is package ‘prepUnitTests’ version ‘0.0.0.9000’
─ package encoding: UTF-8
✔ checking package namespace information ...
✔ checking package dependencies (2s)
✔ checking if this is a source package ...
✔ checking if there is a namespace
✔ checking for executable files ...
✔ checking for hidden files and directories
✔ checking for portable file names
✔ checking for sufficient/correct file permissions ...
✔ checking serialization versions
✔ checking whether package ‘prepUnitTests’ can be installed (601ms)
✔ checking installed package size ...
✔ checking package directory ...
✔ checking for future file timestamps ...
✔ checking DESCRIPTION meta-information ...
✔ checking top-level files ...
✔ checking for left-over files
✔ checking index information
✔ checking package subdirectories ...
✔ checking R files for non-ASCII characters ...
✔ checking R files for syntax errors ...
✔ checking whether the package can be loaded ...
✔ checking whether the package can be loaded with stated dependencies ...
✔ checking whether the package can be unloaded cleanly ...
✔ checking whether the namespace can be loaded with stated dependencies ...
✔ checking whether the namespace can be unloaded cleanly ...
✔ checking loading without being on the library search path ...
✔ checking dependencies in R code ...
✔ checking S3 generic/method consistency ...
✔ checking replacement functions ...
✔ checking foreign function calls ...
✔ checking R code for possible problems (1.1s)
✔ checking for missing documentation entries ...
─ checking examples ... NONE
✔ checking for unstated dependencies in ‘tests’ ...
─ checking tests ...
✔ Running ‘testthat.R’ (351ms)
✔ checking for non-standard things in the check directory
✔ checking for detritus in the temp directory
── R CMD check results ────────────────────────────────────── prepUnitTests 0.0.0.9000 ────
Duration: 5.9s
0 errors ✔ | 0 warnings ✔ | 0 notes ✔devtools::test() Output
ℹ Testing prepUnitTests
✔ | F W S OK | Context
✔ | 4 | rmse
══ Results ═════════════════════════════════════════════════════════════════════════
[ FAIL 0 | WARN 0 | SKIP 0 | PASS 4 ]Which gives us a nice formatting showing our successes.
devtools::check() will also include this summary if you do have any failing tests.
Adding a Failing Test
Let’s add another test to our rmse() function.
test-rmse.r
test_that("rmse works for various vectors", {
  expect_equal(rmse(c(1,2,3), c(2,2,2)), 0.816, tolerance = 0.01)
  expect_equal(rmse(c(0,0,0), c(10,10,10)), 10)
  expect_true(is.na(rmse(c(1,2,NA), c(1,2,3))))
  expect_error(rmse(c(1,2), c(1,2,3)))
})
test_that("rmse works for a fitted model", {
m <- lm(Petal.Length ~ Petal.Width, data = iris)
fit <- fitted(m)
act <- iris$Petal.Length
x <- rmse(fit, act)
expect_type(x, "character")
expect_lt(x, 0.01) ## Expect "less than"
})Errors on Our Tests
Now if we run our tests…
ℹ Testing prepUnitTests
✔ | F W S OK | Context
✖ | 2 4 | rmse
───────────────────────────────────────────────────────────────────────────────────────────
Failure (test-rmse.R:15:3): rmse works for a fitted model
`x` has type 'double', not 'character'.
Failure (test-rmse.R:16:3): rmse works for a fitted model
`x` is not strictly less than 0.01. Difference: 0.465
───────────────────────────────────────────────────────────────────────────────────────────
══ Results ════════════════════════════════════════════════════════════════════════════════
── Failed tests ───────────────────────────────────────────────────────────────────────────
Failure (test-rmse.R:15:3): rmse works for a fitted model
`x` has type 'double', not 'character'.
Failure (test-rmse.R:16:3): rmse works for a fitted model
`x` is not strictly less than 0.01. Difference: 0.465
[ FAIL 2 | WARN 0 | SKIP 0 | PASS 4 ]Fixing our Test
Having got some failures, we’d either fix our test or our function.
test-rmse.r
test_that("rmse works for various vectors", {
  expect_equal(rmse(c(1,2,3), c(2,2,2)), 0.816, tolerance = 0.01)
  expect_equal(rmse(c(0,0,0), c(10,10,10)), 10)
  expect_true(is.na(rmse(c(1,2,NA), c(1,2,3))))
  expect_error(rmse(c(1,2), c(1,2,3)))
})
test_that("rmse works for a fitted model", {
m <- lm(Petal.Length ~ Petal.Width, data = iris)
fit <- fitted(m)
act <- iris$Petal.Length
x <- rmse(fit, act)
expect_type(x, "numeric")
expect_lt(x, 0.5) ## Expect "less than"
})Tests in a Package
Unit tests are well supported in R package development.
- Construct them using
usethis::use_test("testname") - run them with
devtools::check()ordevtools::test() - writing useful tests makes certain your functions behave as intended
Unit Tests in a Project
Setting up Unit Tests for a Project
Now imagine that we don’t want to make an R package, but instead have a project
- i.e. just a folder (that we could store on Github)
We can still setup unit tests with the testthat package.
- Add a folder called “tests” to the project.
- Add your testing files in there (i.e. “test-rmse.r”)
Project Setup
We also need to have saved our rmse() function somewhere.
- For now, let’s just put it in “code/rmse.r”
tests/test-rmse.r
test_that("rmse works for various vectors", {
  expect_equal(rmse(c(1,2,3), c(2,2,2)), 0.816, tolerance = 0.01)
  expect_equal(rmse(c(0,0,0), c(10,10,10)), 10)
  expect_true(is.na(rmse(c(1,2,NA), c(1,2,3))))
  expect_error(rmse(c(1,2), c(1,2,3)))
})

test_that("rmse works for a fitted model", {
  m <- lm(Petal.Length ~ Petal.Width, data = iris)
  fit <- fitted(m)
  act <- iris$Petal.Length

  x <- rmse(fit, act)

  expect_type(x, "numeric")
  expect_lt(x, 0.5) ## Expect "less than"
})Running our Tests
Now that there is not a package structure, we have to run our tests with
testthat::test_dir("tests")
✔ | F W  S  OK | Context
✖ | 2        0 | rmse
────────────────────────────────────────────────────────────────────────────────────
Error (test-rmse.r:2:3): rmse works for various vectors
Error in `rmse(c(1, 2, 3), c(2, 2, 2))`: could not find function "rmse"
Backtrace:
    ▆
 1. └─testthat::expect_equal(rmse(c(1, 2, 3), c(2, 2, 2)), 0.816, tolerance = 0.01) at test-rmse.r:2:3
 2.   └─testthat::quasi_label(enquo(object), label, arg = "object") at testthat/R/expect-equality.R:62:3
 3.     └─rlang::eval_bare(expr, quo_get_env(quo)) at testthat/R/quasi-label.R:45:3

Error (test-rmse.r:13:3): rmse works for a fitted model
Error in `rmse(fit, act)`: could not find function "rmse"
────────────────────────────────────────────────────────────────────────────────────

══ Results ═════════════════════════════════════════════════════════════════════════
── Failed tests ────────────────────────────────────────────────────────────────────
Error (test-rmse.r:2:3): rmse works for various vectors
Error in `rmse(c(1, 2, 3), c(2, 2, 2))`: could not find function "rmse"
Backtrace:
    ▆
 1. └─testthat::expect_equal(rmse(c(1, 2, 3), c(2, 2, 2)), 0.816, tolerance = 0.01) at test-rmse.r:2:3
 2.   └─testthat::quasi_label(enquo(object), label, arg = "object") at testthat/R/expect-equality.R:62:3
 3.     └─rlang::eval_bare(expr, quo_get_env(quo)) at testthat/R/quasi-label.R:45:3

Error (test-rmse.r:13:3): rmse works for a fitted model
Error in `rmse(fit, act)`: could not find function "rmse"

[ FAIL 2 | WARN 0 | SKIP 0 | PASS 0 ]
Error: Test failures
Sourcing Our Function First
Because we need to load our custom function first.
✔ | F W  S  OK | Context
✔ |          6 | rmse

══ Results ═════════════════════════════════════════════════════════════════════════
[ FAIL 0 | WARN 0 | SKIP 0 | PASS 6 ]
And we pass all of our tests!
Sourcing Our Function in Our Tests
This is not recommended for packages, but in a project I would consider sourcing the rmse() function in our testing file.
We have to go up one folder because tests are run in the “tests” folder, so the relative path to the code folder requires the “..” to go up a folder first.
Now Running Project Tests
Now that the our unit test sources the rmse() function itself, we can simply run
✔ | F W  S  OK | Context
✔ |          6 | rmse

══ Results ═════════════════════════════════════════════════════════════════════════
[ FAIL 0 | WARN 0 | SKIP 0 | PASS 6 ]
I think for a project this is good.
- Each test file is self-sufficient
- Lets you run tests from the terminal or anytime during the project
- But sometimes your tests will rely on the rest of your code running first
Testing Your Analysis
I think a good general form for a “main.R” script is:
main.r
# Restore renv environment (should happen automatically)
renv::restore()

## Data Cleaning
source("code/clean-data.r")
source("code/transform-data.r")

## Analysis
source("code/run-regressions.r")

## Figures & Tables
source("code/figures/make-scatter-plot.r")
source("code/tables/make-summ-table.r")
source("code/tables/make-reg-table.r")

## Run Tests
testthat::test_dir("tests")
This way, everytime you run “main.R” your tests will run at the end.
Data Science Project Suggested Tests
- The raw data
- dimensions
- range of values (i.e. percent variables are in 0 - 100)
- no missing values (or the expected number of missings)
- Same for “transformed” data (i.e. ready for analysis step)
- The regression results
- coefficients are what I expect
- especially for any key result that I report in my paper
- Figures and Tables
- non-empty
Writing Data Science Tests
Hopefully you already see how you could write a test using testthat for each of those items.
Then, as your project evolves, you’ll notice whenver something changes from what you expect.
There is one more package that is useful for this situation:
testdat: test data validation
testdat package
Why Another Package?
testthat has many basic expect_() functions that you can use to write any custom test you want.
testdat has written custom expect_() functions that make it easier to validate data.
- Basically, think of it as
expect_()functions written for data.frames
testdat example
Let’s make mtcars into a data.table.
                  rn   mpg   cyl  disp    hp  drat    wt  qsec    vs    am
              <char> <num> <num> <num> <num> <num> <num> <num> <num> <num>
1:         Mazda RX4  21.0     6   160   110  3.90 2.620 16.46     0     1
2:     Mazda RX4 Wag  21.0     6   160   110  3.90 2.875 17.02     0     1
3:        Datsun 710  22.8     4   108    93  3.85 2.320 18.61     1     1
4:    Hornet 4 Drive  21.4     6   258   110  3.08 3.215 19.44     1     0
5: Hornet Sportabout  18.7     8   360   175  3.15 3.440 17.02     0     0
6:           Valiant  18.1     6   225   105  2.76 3.460 20.22     1     0
    gear  carb
   <num> <num>
1:     4     4
2:     4     4
3:     4     1
4:     3     1
5:     3     2
6: 3 1testdat failure example
If instead we check if “cyl” column gives unique values…
testdat Test Values
We can expect certain values using…
expect_values(data = mtdt, cyl, c(4, 6, 8))
expect_values(data = mtdt, cyl, c(4, 6, 8, 100))
expect_values(data = mtdt, cyl, c(4, 6))
Error: `mtdt` has 14 records failing value check on variable `cyl`.
Variable set: `cyl`
Filter: None
Arguments: `<dbl: 4, 6>, miss = <chr: NA, "">`You can also test columns for character values c("A", "B", "C").
testdat Test Ranges of Values
And we can expect a range of values instead of specific ones…
testdat Test a Condition
And we can test an if-then condition…
testdat Overview
Many useful expect_ functions for working with data.frames.
Very useful in an economics research project setting.
Not as useful for testing a package (unless its a data package).
Summary
Lecture Summary
- What are Unit Tests
- Unit Tests in R
testthattestdat
- Unit Testing for Packages
- Unit Testing for Projects
Github Actions
Lecture Summary
- What are Github Actions?
- Workflows
- jobs
- steps
- events
- runners
Github Actions
Automate, customize, and execute your software development workflows right in your repository with GitHub Actions. You can discover, create, and share actions to perform any job you’d like, including CI/CD, and combine actions in a completely customized workflow. - Github Action documentation
Github Actions in summary
Allow you to execute code on a remote server hosted by Github.
- Can be configured to execute on certain events (i.e. whenever you push to Github)
- Can execute code in your project
- Or can execute prebuilt “actions” from Github or other parties
- The servers can run Linux, Windows, or MacOS
Github Actions Tab
There is a tab for Github Actions for every repository.
Github Actions Billing
You are running code on someone else’s server, so there is a limit to how much you can run. Github Action Billing.
But, Github Actions are free for public repositories.
And, you should have 2,000 minutes of run time for private repositories for a free account.
- You will have more if you sign up for the free Student Developer Pack.
So practically, you can run most things without a worry.
Github Action Compute Power
By default, Github Actions will run on a server with
- 3-4 CPU cores
- 16 GB memory
- 16 GB hard drive storage
Which is to say, these server resources are not super big. Probably your computer will be faster at everything.
But they also should be big enough to run most projects.
Upgrading Github Action Compute
You can upgrade to Github Actions running on servers that allocate more resources to you.
Up to
- 64 CPU cores
- 256 GB memory
- 2 TB hard drive
But this will start costing actual money to do (Github Larger Runners). You should probably be looking at running your code on Brown’s HPC if you need something close to this size.
Github Actions Overview
Github Actions is a service that allows you to run workflows.
A Workflow Diagram:
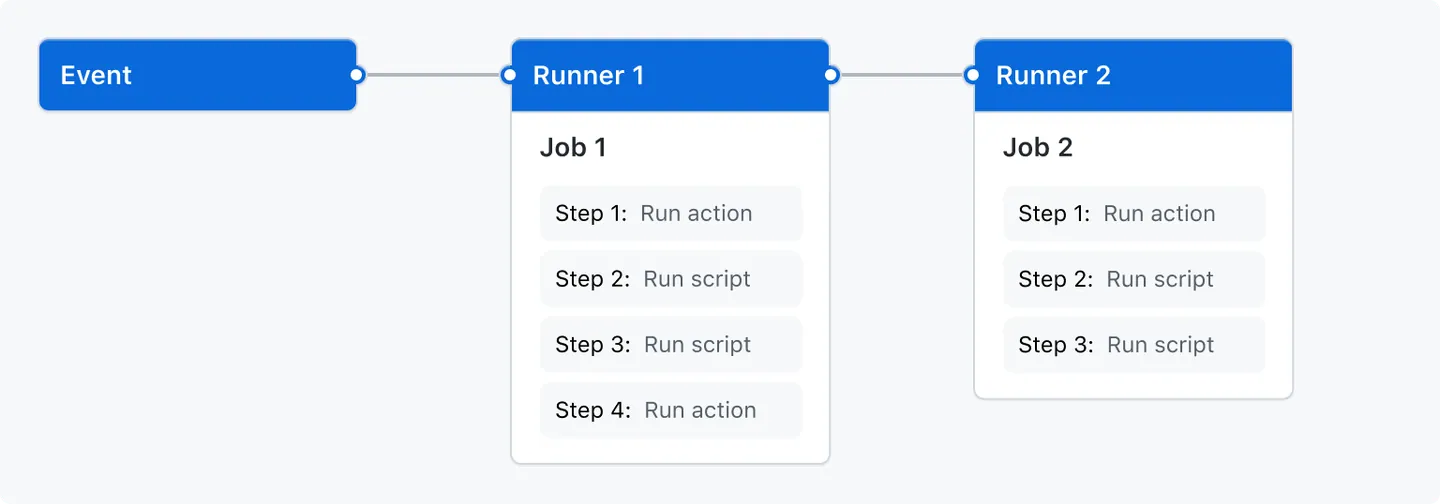
from the Github Actions documentation
Events
Events are what trigger a workflow to run.
- Could be a Git event
- push to Github
- pull request, etc.
- Can be triggered manually
- Or set to run at specified time intervals (i.e. once a day)
Runners
A runner is a server—hosted by Github—that will run your jobs.
There is always one runner for each job.
They are virtual machines that can have Ubuntu Linux, Microsoft Windows, or macOS operating systems.
They default to a small amount of computing power, but can be upgraded.
Jobs
Jobs are a set of steps to be run.
One job gets assigned to each runner.
Jobs can be run in parallel (default) or in sequence.
A workflow could have one or more jobs.
Steps
Steps are the actual commands given to the runner (the server).
Steps can be either:
- A shell script (i.e. commands sent to the command line)
- an action
Steps are where we will say “run this code” or “execute this R script”
Actions
This is not to be confused with Github Actions which is the name of the whole service.
An action is…
- a custom application that performs a complex and frequently repeated task
Basically, an action performs many steps (kind of like a function call).
Github provides some default actions, and you can use actions written by other users.
Github Actions Overview
Github Actions is a service that allows you to run workflows.
A Workflow Diagram:
from the Github Actions documentation
Example Github Workflow
name: learn-github-actions
run-name: ${{ github.actor }} is learning GitHub Actions
on: [push]
jobs:
  check-bats-version:
    runs-on: ubuntu-latest
    steps:
      - uses: actions/checkout@v4
      - uses: actions/setup-node@v4
        with:
          node-version: '14'
      - run: npm install -g bats
      - run: bats -v
We are going to look at each piece of this in turn.
I am not trying to have you learn how to write one of these. In general, you will be copying and maybe lightly editing ones that already exist. The goal is to be able to read one.
Example Github Workflow
- Optional
- Sets the name of the workflow
- This is how it will appear in your Github repository’s “Action” tab
Example Github Workflow
- Also optional
- This is the name of the Github Action when it is actually running
- The
${{ github.actor }}is grabbing your Github username as a variable - In general, whenever you see
${{ }}, that is referencing a variable- defined by the workflow
- defined by default by Github (i.e. your username)
Example Github Workflow
- Event trigger
- This workflow will trigger whenver there is a “push” to this Github repository
You could also only trigger the workflow when certain files are edited, or when the repository is forked, there are many options.
Example Github Workflow
jobs:
  check-bats-version:
    runs-on: ubuntu-latest
    steps:
      - uses: actions/checkout@v4
      - uses: actions/setup-node@v4
        with:
          node-version: '14'
      - run: npm install -g bats
- run: bats -v- This workflow has only one job
- So it will be run on only one runner
- The job is named “check-bats-version”
Example Github Workflow
jobs:
  check-bats-version:
    runs-on: ubuntu-latest
    steps:
      - uses: actions/checkout@v4
      - uses: actions/setup-node@v4
        with:
          node-version: '14'
      - run: npm install -g bats
- run: bats -v- The job
runs-on“ubuntu-latest”
- “ubuntu-latest” = linux
- “macos-latest” = macos
- “windows-latest” = windows
You can also choose to run on a specific prior version of an OS.
Example Github Workflow
steps:
  - uses: actions/checkout@v4
  - uses: actions/setup-node@v4
    with:
      node-version: '14'
  - run: npm install -g bats
  - run: bats -v
This job has 4 steps (count the dashes).
Remember, the steps are the actual commands being run on the server.
Example Github Workflow
The uses shows that this is running an action
actions/checout@v4 is a default Github action
- It checks out the current Github repository
- i.e. this clones your repository onto the server’s virtual machine
- Most workflows will start with this
Example Github Workflow
The next step is also an action.
actions/checout@v4 is a default Github action
- It installs and sets up “node.js” which allows you to run javascript
- the
with:command sets an option for the action - here, it is specifying the version of “node.js” to install
- the
When runners launch a virtual machine for us, they only have the operating system installed (and some other basics). Anything else we want to use we have to install with an action or install ourselves.
Example Github Workflow
These last two steps are not actions, but just shell commands. You can see that by the run keyword.
npm install -g bats is a command telling “node.js” to install the bats package.
bats -v is a command asking for the version of the package bats.
Example Github Workflow
jobs:
check-bats-version:
runs-on: ubuntu-latest
steps:
- uses: actions/checkout@v4
  - uses: actions/setup-node@v4
    with:
      node-version: '14'
  - run: npm install -g bats
- run: bats -vNow we know how this defines a Github workflow.
Let’s see where we put this in Github.
Setting Up a Github Workflow
Github Workflows live a specific folder in your repository:
“.github/workflows/”
Each workflow is defined by a “yaml” file.
- “main.yml”
- “test.yml”
Once you define this folder, and a “yaml” file in it, Github will launch a workflow for you defined by the file.
Setting up a Github Workflow
For your first workflow, it may be easier to define it through Github.
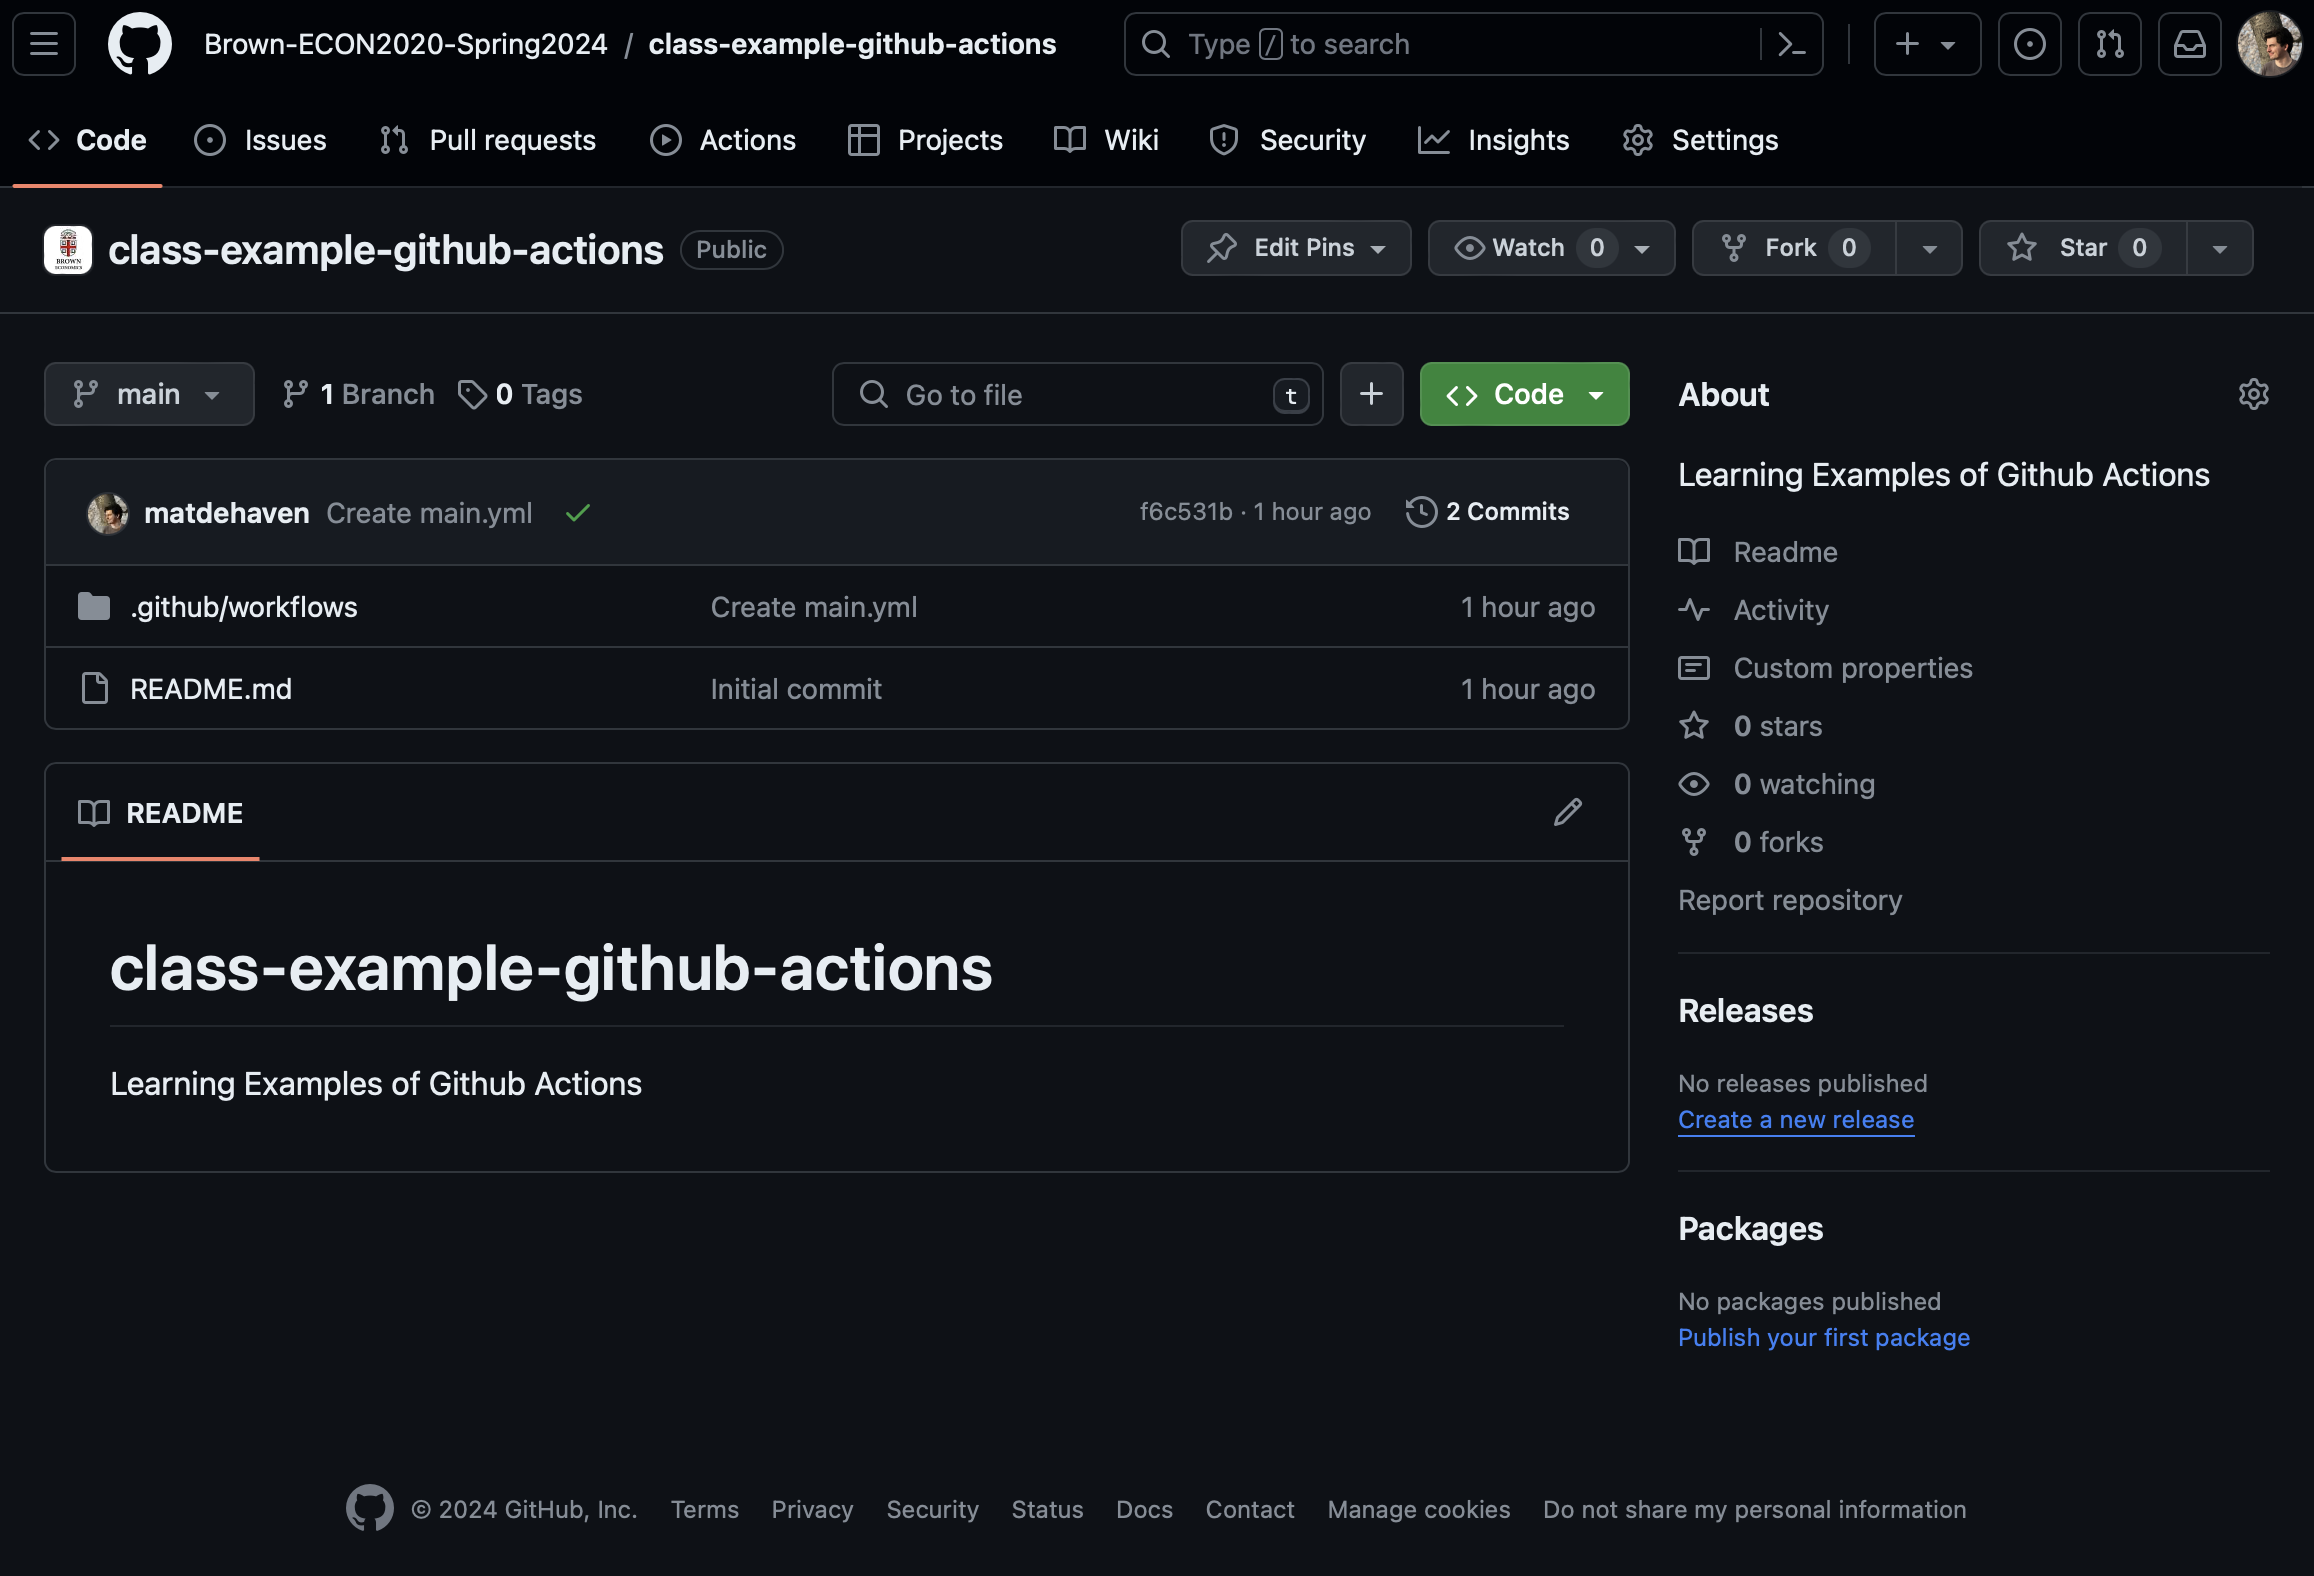
This is how you will do your assignment and also what is detailed in the coding example.
Github Actions for R
Using Github Actions with R
We have seen how Github Actions can run code for us on virtual machines.
How do we get it to run R code?
We first have to tell it to install R, then give it R code to run.
Example Github Action for R
This is a very basic Github workflow that runs print("hello world") in R.
Example Github Action for R
First, we had to install R on the virtual machine.
Example Github Action for R
Then, we simply executed our R command.
- The
Rscript -e 'command'allows you to run any one-line R command
Example Github Action for R
on: [push]
name: Run R code example

jobs:
  run-some-R-code:
    runs-on: ubuntu-latest
    steps:
      - uses: actions/checkout@v4

      - uses: r-lib/actions/setup-r@v2

- run: Rscript -e 'print("hello world")'But what if we want to run more than one line?
Example Github Action for R script
Usually we will have R scripts written in our repository that we want to run.
Let’s assume we have a “main.r” file, we can run it with…
Example Github Action for R script
This is still a single step.
The name: line just names the step and is optional.
The run: line is broken up into multiple lines with the | symbol.
And then an R script can be run by calling Rscript name-of-file.r.
What about Packages?
Remember, these virtual machines come with nothing installed.
Which means we don’t have access to any packages.
A couple of options:
- Write a script to install all the packages by calling
install.packages()orrenv::install()
- Use
renvto create a lockfile, and then simply runrenv::restore()
Option 2 is far better to option 1. In fact, there is a r-lib action that will restore a renv environment for us.
Example Github Action for R + renv
on: [push]
name: Run Main.r

jobs:
  RunMain:
    runs-on: ubuntu-latest
    steps:
      - uses: actions/checkout@v4

      - uses: r-lib/actions/setup-r@v2

      - uses: r-lib/actions/setup-renv@v2

      - name: Run main.r
        run: |
          Rscript main.r
This will restore our environment to the state of packages in the lockfile.
It also caches them, so next time our workflow runs, it’s much faster.
More Pre Built Actions
Pre-built Github Actions for R
- with all the “r-lib” community actions.
They also have a set of example workflows:
Continuous Integration (CI)
Continuous integration (CI) is a programing practice / framework.
The idea is that team of developers write their own sections of code separately, but continually integrate their code to a common repository.
- This common repository then automatically builds and tests the code.
This is in contrast to a system where developers write their code on their own machine, then everyone merges their code together at the end and tries to fix any errors then.
You sometimes will see CI/CD for Continuous Integration/Continuous Deployment. Which adds that the main repository of code is automatically shipped/deployed so customers/other people can use it.
CI with Github Actions
Github allows users to effectively have a CI practice for their code.
If working with multiple users, they can all share a common repository.
And Github Actions can build the code and run tests automatically.
CI for Academic Research Projects
How could CI be useful for us?
- Run tests automatically
- “build” your entire research project automatically
- i.e. run the “main.r” file, build the results from scratch
- Enforces reproducibility
- checks multiple operating systems and starts from a machine with nothing installed
Github Actions I Have Used
Here are a few Github Actions I have used for projects:
- Run
devtools::check()on an R package I was writing - Run unit tests for a research project
- Check the coverage of unit tests for package
- Run “main.r” for a project
- Compile Quarto documents into pdfs
- Run
stylrandlintrwhich check your code’s style formating - Build websites for Github Pages
Summary
Lecture Summary
- Github Actions
- Continuous Integration (CI)
- for testing code
- for data validation
- for reproducibility